Functions in the Windows grid
In accordance with our Lifecycle policy, the Windows GUI is no longer supported from Thinkwise Platform version 2026.1 and higher. This means some features on this page are no longer supported. See Transition to the Universal UI for more information.
Introduction
All functions that appear in the grid part of the screen are dealt with in this chapter. There are a large number of functions in the grid. Some are immediately available on the screen, others via the so called context menu, which appears when the right-hand mouse button is pressed.
On the screen
A large number of functions in the grid are directly accessible using the mouse.
Select a record
To select one record click on the record that you want to select. As soon as a record is selected the information can be examined in the detail screen and the sub-categories of the record are available. A selected record can be recognized by the triangle in front of the record and the dotted line on the record. It can also occur that this record changes color, as can be seen in the figure below.
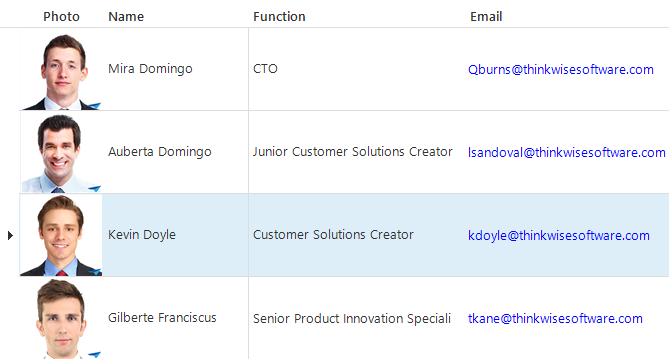 The third record is selected
Select one cell
Click a cell to select it. This can be used, for example, for a quick filter. The cell that is selected gets a dotted line around it.
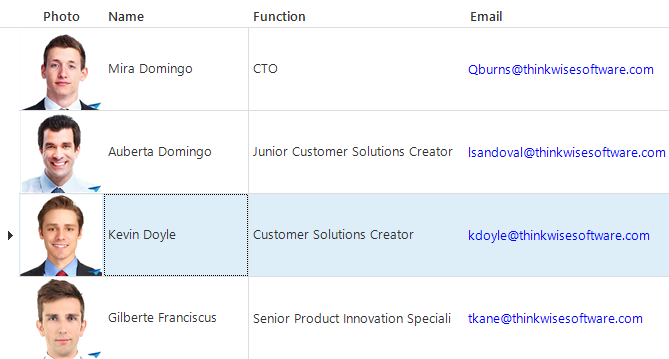 The cell 'Kevin Doyle' is selected within the selected record.
Open a record
Open a record in the grid section of a hierarchy screen
Double click on a record to open it.
When a detail must be opened in a new screen, double click on the record in combination with the Ctrl key.
Open a record in a master-detail screen
Click on a record in the grid to open a record in a master-detail screen. The detail then displays the selected record.
Share a record
To share a record with another user, right-click in the record and go to menu Extra - Share:
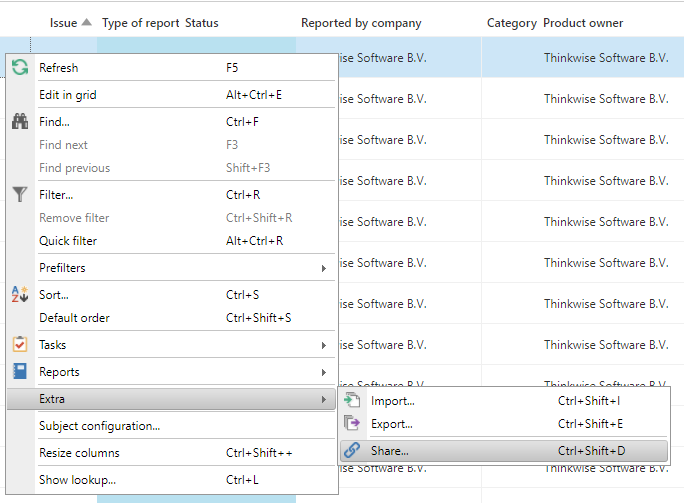 Sharing a record
Now copy the deep link to your clipboard and use it to share it in a way you see fit:

This deep link cannot be opened by another user.
Select a value in a column
If a column contains a domain or lookup column with elements, users can select the values from a control in each cell in the column.
See:
Navigate through a grid (Web)
When using the product on the web it will be noticed that a grid is sub-divided into different pages. When the mouse is positioned above a column, this becomes visible with the figure below. These buttons can be used to browse through the pages.
![]() Page layout in the web
Page layout in the web
Toolbar
When the grid is selected a large number of functions are available via the 'Start' toolbar. Consider functions such as refresh, edit, search and filter. These functions will be explained one by one.
 Toolbar
A function can be started in three different ways. The functions followed by three full stops are always followed by a pop-up and therefore never start immediately. The functions without full stops start immediately, without a pop-up screen. The options with an arrow open a sub-menu with options from which a selection can be made.
Most options are also available in the context menu, which can be called up by clicking on the grid with the right mouse button.
Refresh
Refreshing is the retrieval of data from the central database, so that the last modifications, possibly done by other users, are visible on the screen. This ensures that the most recent data is always worked with.
 Refresh in the toolbar
Refreshing is also useful if several tabs are open and these tabs influence each other, or details of tabs.
Refreshing is especially important if several users are working in the same screen because changes from other users are also processed.
Edit mode
The 'Edit mode' is used to quickly carry out a large number of modifications in the grid. By enabling this function it is possible to edit data in the grid. Normally speaking it is only possible to modify data in the Form View.
 Edit mode in the toolbar
Tasks
There may be tasks available in the toolbar. A task is a specific assignment to execute a specific activity, calculation or procedure in the program. The task is always company specific and therefore we will not discuss it further here. If there are tasks available then these can be found for each work screen in the toolbar under Tasks. It can also be that this is displayed on the screen as an icon, depending on the set up that has been chosen by the developer.
 Tasks in the toolbar
Reports
As well as tasks available in the toolbar there can also be reports present. When this option is selected the program generates a report on the basis of the data in your program. The reports are always company specific and therefore we will not discuss them further here.
 Reports in the toolbar
Examples of reports are a quotation, order confirmation, purchase order, sales invoice or an order picking list.
Resize columns
When the width of the columns is changed, for instance, by widening a column, then this can be restored again. When this is done once the columns are set exactly so wide that the heading and the visible data are displayed. If 'Resize columns' is clicked on again, the columns are adjusted to only display the visible data. This may mean that the entire heading of the column is not visible, but you do not lose any space through a long heading above a column.
 Resize columns in the toolbar
Export
When it is required to use data from a table in Microsoft Excel then this data can be exported. This is done with the function 'Export'.
When data is exported, the user is guided through a number of selection screens.
It is firstly asked which rows need to be exported. The following options are available:
-
Selected rows
-
All rows in the grid
-
All rows in the grid (ignore maximum number of rows)
The last option is only shown if a maximum number of records is defined. This
can be recognized by the symbol ![]() in
the heading of the table.
in
the heading of the table.
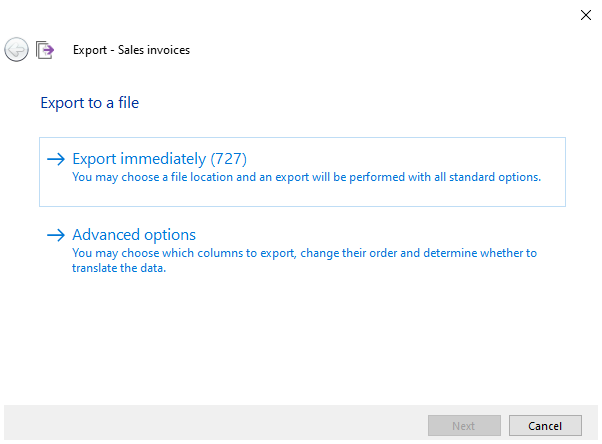 Export options
On the following screen it can be indicated which rows must be exported with the help of check marks.
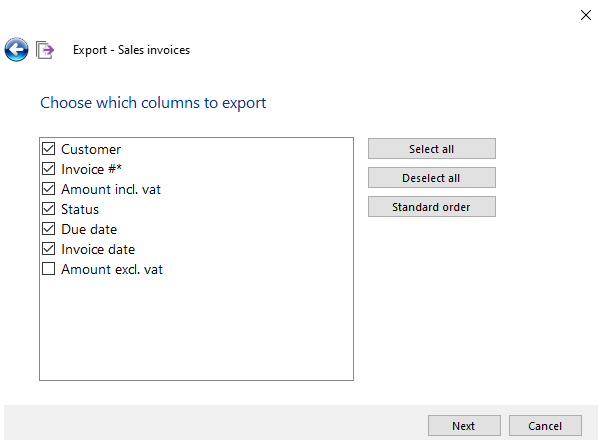 Which columns to export
It can then be indicated whether the column headings need to be exported and whether the IDs (the values that are in the database) or the translations (values that are displayed) of the column headings need to be exported.
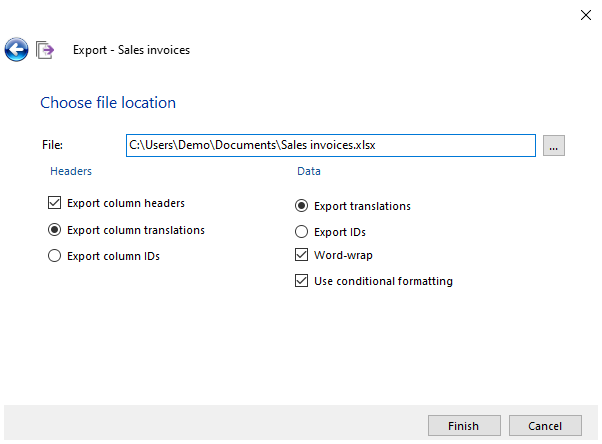 Export ID or translation
Finally the file name must be entered. As default the files are exported as
.xlsx files to the user folder. If the file type or the file location must be
changed then this is done with the ![]() button
next to the field for entering the file name.
button
next to the field for entering the file name.
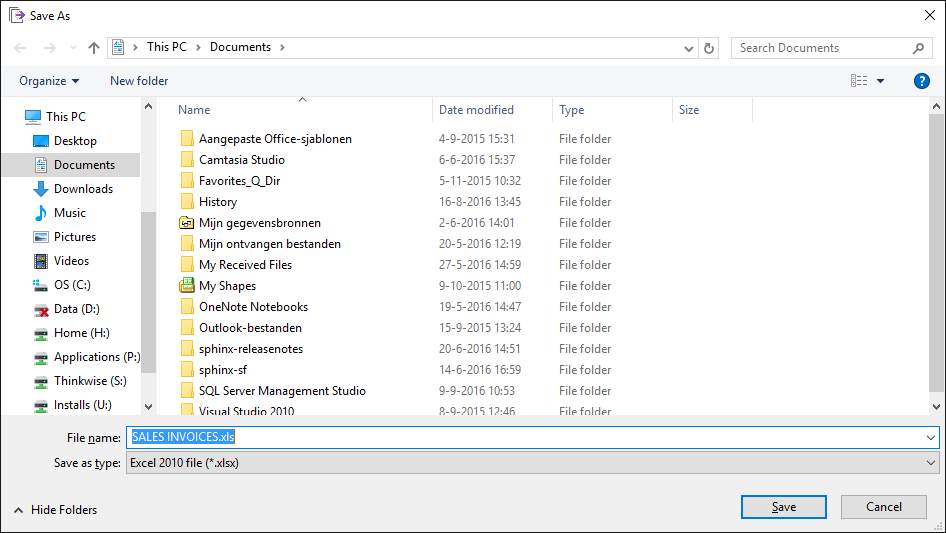 Storage location for exporting
Import
Along with exporting data it is also possible to import data. Just as with exporting data there are a number of steps to go through when importing data.
When the import is started, which can be done via the toolbar, the location of the file to be imported must first be entered or browsed for.
 Import
The following screen is then displayed.
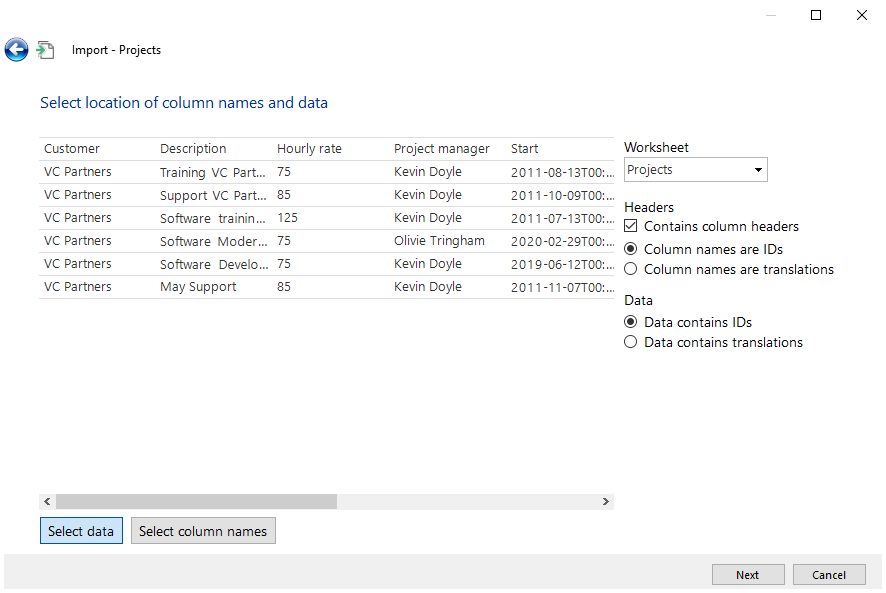 File selection during the import
The data that must be imported is selected in this screen. This can be done by dragging the blue border. Furthermore it must be indicated with the check mark that the data includes column names. If this is the case then where the column names are located is indicated with the 'Select column names' button . (In most cases this is at the top and this is automatically correct. It is then indicated whether the columns are translations or IDs. When the required data and options are selected the Next button is clicked on.
In the next window it is indicated with check marks which columns need to be imported and which column from the file corresponds with the column from the existing table. Furthermore the field can be left empty and an Alternative value may be entered in the field next to it (this applies to all the rows that are imported).
Click on Finish to complete the import.
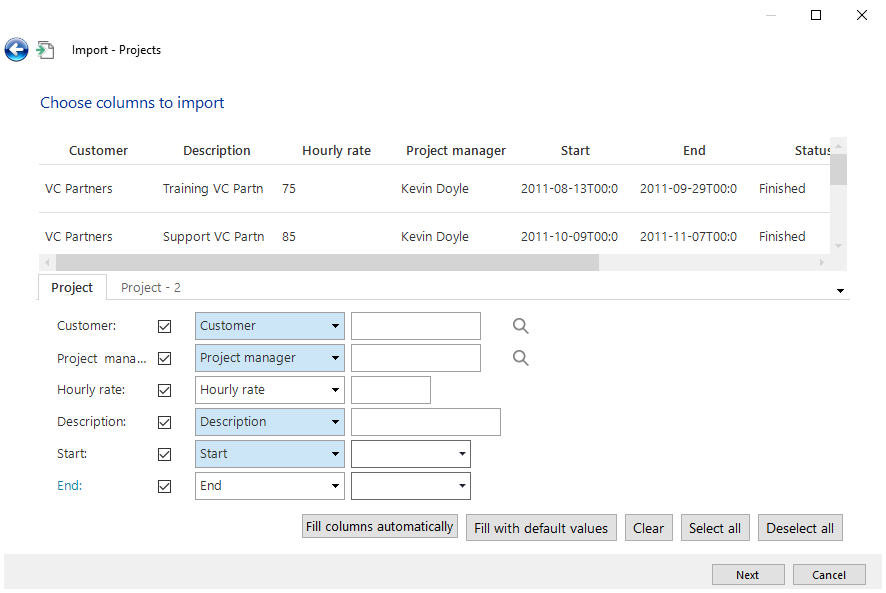 Enter value during import
Update
Using the Update option large amounts of data can be modified at once. This takes place via the 'Update' function in the toolbar between Import and Export.
The following options become available when Update is clicked on:
-
Selected rows
-
All rows in the grid
-
All rows in the grid (ignore maximum number of rows).
-
Rows from a file
When the last option is chosen you can opt with a check mark to add non-existing rows, which are in the file, but which are not in the table.
After selecting one of the options the Update window is displayed. The value can be entered here for the columns that must be updated.
Rows can also be updated from an Excel or CSV file. The choice can then be made to add non-existing rows or to only update the current rows.