Translations
Introduction to translations
All objects used in user interfaces, such as labels, buttons, tables, and columns, can be translated. Translations can be accessed and managed in two ways:
- Overview of all translation objects - A screen with all translation objects is available in the menu User interface > Translations. Here, you can generate translation objects for the entire branch at once.
- Overview by subject - All subjects that can be translated have their own Translation tabs. Here, translation objects are generated only for the current subject type.
Application languages
Thinkwise supported languages
The Thinkwise Platform provides default translations for the following languages:
- Dutch
- English
- German
- French
- Spanish
- Portuguese
Add additional languages
You can add additional languages to the Master data. The Thinkwise Platform fully supports Unicode characters, which means that any language is supported.
To identify a language, use the composite IETF language tag, like en-US.
To add a new language:
menu Advanced > Master data > Model > Application languages
- Add a new language.
- Windows GUI Set a flag icon, visible for the user when they select a language from the ribbon.
 Application languages
Application languages for a branch
- For all Thinkwise-supported languages, a base model with GUI translations is available in the menu Models > Model overview > tab Branches > tab Base models.
- An overview of the languages in a branch is available in the menu Models > Model overview > tab Branches > tab General settings > tab Application languages.
The following rules apply:
- Translation objects are generated for all application-specific terms and need to be translated in every specified language.
- To add a new language, you must link its corresponding base model.. See Base models.
- All GUI labels and messages are added and translated for all linked Thinkwise-supported languages.
- Translations for database errors and warnings are available in a base model for English, German, and Dutch (
DB2_MSG_TRANSL,ORACLE_MSG_TRANSL,SQLSERVER_MSG_TRANSL). Each supported database platform contains its own errors. Only base models with the same database platform as the work model will be shown.
Fallback language
Universal GUIThe fallback language is applied when a user uses a language that is not available for the application. It can replace the selected language when starting the application via IAM and when starting the application directly on the Software Factory. A language can, for example, be available if the application is started via IAM but not if it is started directly on the Software Factory. In that case, the fallback language is used in the Software Factory.
To set the default fallback language for new model:
menu Maintenance > Configuration > group Defaults
- Select a Fallback language.
To set the fallback language for a branch:
menu Models > Model overview > tab Branches > tab Model settings > group Application language
- Select a Fallback language.
Login language
IAM > menu Settings > Global translations
Global translations are used for the login process in web applications, when a user's identity and application language are not yet known.
Translation objects
For each translatable object, such as tables, columns and tasks, a translation object is created. It allows you to enter the translation and some additional attributes for each language, depending on the object type:
- (Single) translation
- Translation form
- Translation grid
- Translation card list
- Plural translation
- Tooltip text - This text appears when the mouse hovers over a field name, group name, tab, or column. Tooltips support many HTML tags and attributes for formatting text. Potentially harmful code, like scripts, is removed for security reasons.
- Help text
The process is as follows:
menu User interface > Translations
-
Translation objects for new translatable objects are automatically created in most cases. Should you still miss them, you can manually generate translation objects. For more information, see Generate translation objects.
-
Translate untranslated objects in one of the following ways:
- By ID - See Translate untranslated objects by ID
- With AI - See Translate untranslated objects with AI
- Manually - See Translate objects manually
![]() Translations screen
Translations screen
Generate translation objects
Translation objects are generated automatically when creating a translatable object. Still, translation objects may be missing. For example, if translatable objects are created without a translation object using the dynamic model. In this case, they will still be added during definition generation. If you want to access them before that, you can generate them manually.
To manually generate translation objects for all new objects:
menu User interface > Translations > tab Translations
- Execute the task Generate translation objects
 .
.
You can execute this task per object type via its respective screen, in the tab Translations, to generate only its translation objects.
Add parameters to translation labels
Universal UIYou can add parameters to translation labels to make them more dynamic and informative. Parameters are supported for translation labels in forms, including groups and sections, formlists, and parameters in task and report pop-ups. Parameters in translation labels also adhere to localization settings, so dates and numbers are formatted according to the user's locale.
The following limitations apply:
- Recursive parameters are not supported, and parameters are resolved only once.
For example,Hello {name}results inHello {first_name}ifnameis{first_name}.
In this case,{first_name}is not resolved further. - If a parameter resolves to either undefined or null, it is omitted from the label while other parameters remain.
For example,
Amount {currency_type} {suggestion}resolves toAmount (EUR)ifcurrency_typeis(EUR)andsuggestionis null.
To add parameters to a translation label:
menu User interface > Translations > tab Translations
Add a translation and a parameter to the corresponding field, for example: Amount {currency_type} {amount}.
You can use multiple parameters in a single translation label, for example: Shipping – status: {shipping_status} – delivery date: {delivery_date}.
- For form and formlist labels, add the translation to the field Translation form.
- For task and report parameter labels, add the translation to the field Translation form.
- For group and section labels in forms, and task and report pop-ups, add the translation to the field Translation.
If you add a parameter to a translation label for a column, only add the parameter to the field Translation form. If a parameter is added to the the field Translation grid, it will display the parameter in curly brackets.
- Community post - Enrich your labels with parameterized translations
 Add parameters to your translation labels in the Software Factory
![]() Users see the resolved parameters in the user interface, in this case, the shipping status
Users see the resolved parameters in the user interface, in this case, the shipping status
Translate untranslated objects by ID
The task for translating objects by ID is designed to generate translations based on the language of the original data model, which ensures consistency within a specific language environment. See also Differences between translating objects by ID and AI.
To translate object(s) based on their identifier:
menu User interface > Translations > tab Translations
-
Select one or more rows with untranslated objects.
-
Execute the task Translate using ID
 .
.All columns in the row are translated. Underscores are replaced with spaces, square brackets are removed, and the first letter is capitalized.
-
To deviate from the entered translation, select a cell and enter a different translation.
Translate untranslated objects with AI
The task Translate using AI prioritizes translations specified for the configured fallback language. This task is only available if your branch contains two or more languages, and one must be translated. See also:
- The enrichment Translation all untranslated objects. in the table with available model enrichments.
- Differences between translating objects by ID and with AI
To translate object(s) using AI:
menu User interface > Translations > tab Translations
-
Select one or more rows with untranslated objects.
-
Execute the task Translate using AI
 .
.All columns in the row are translated.
-
To deviate from the entered translation, select a cell and enter a different translation.
Translate objects manually
To manually translate the selected translation object(s):
menu User interface > Translations > tab Translations
- Select the translation in one of the columns.
- Enter the translation.
- Press Enter to add the same translation to the other columns.
- To deviate from the entered translation, select a cell and enter a different translation.
Translations for link tables
Link tables displayed as detail tabs often need a different translation depending on the context.
A different translation is possible by including the plural translations of both master subjects,
separated by a forward slash / in the column Translation plural of the linking table.
The user interface will show the part of the translation that is not equal to that of the current master table.
For example, by giving the link table between person and company the translation Persons/Companies, the table will have the translation Companies under person and Persons under company.
Differences between translating objects by ID and with AI
The following example illustrates how Translate using ID prioritizes maintaining the original language, while Translate using AI facilitates translations within your data branch.
Consider the following scenario: the object name "[customer_name]" must be translated from English to Dutch, and the English source translation is "Customer name".
- Translate using ID - Translates the object name to "Customer name".
- Translate using AI - Translates the object name to "Klantnaam" because the task uses AI to identify the target language (Dutch) and translate the object name accordingly.
Alternative translations
Alternative translations can be created for a variety of objects.
Alternative translation labels are created directly for the same object type as the original object.
This approach ensures consistency and reduces the total number of translation labels.
For example, the column customer_id will share the same translation as its alternative translation label customer_number
because they belong to the same object type.
To create alternative translations:
- For columns - see Alternative translations for a column.
- For table variant columns - see Alternative translation for a table variant column.
- For task parameters - see Set up task parameters.
- For task variant parameters - see Alternative translation for a task variant parameter.
- For report parameters - see Set up report parameters.
- For report variant parameters - see Alternative translation for a report variant parameter.
In these cases, you will keep generic column names while customizing the translations in your applications based on their context or purpose.
You can also create alternative translations for Confirm and Cancel buttons in:
- Tasks - see Alternative translation for task buttons.
- Task variants - see Alternative translation for task variant buttons.
- Reports - see Alternative translation for report buttons.
- Report variants - see Alternative translation for report variant buttons.
Review translations
To review translations:
menu User interface > Translations
-
Enable the prefilter Not yet approved
 to see all translations that have not been reviewed yet.
 -
Review translations by approving or disapproving them:
- Approve translation
 - Approve the translation.
 - Disapprove translation
 - Disapprove the translation and provide feedback about why it was disapproved.
- Approve translation
-
To filter disapproved translations, enable the prefilter Disapproved
 .
A validation is generated that can be assigned to a user.
.
A validation is generated that can be assigned to a user.
If a translation changes, the translation must be reviewed again (the status Approved is reset).
No translation review required
Not every model requires a translation review. For example, single developer models, or models where translations are reviewed by an external party.
To hide the tasks for (dis)approving translations and the validations regarding the not yet (dis)approved translations:
menu Maintenance > Configuration
- Clear the checkbox Translation review required.
Grant access to a translator
You can grant access to an external translator in two ways:
-
Indirect access via Excel - In the Software Factory, export the program objects for the language that needs to be translated to Excel: menu User interface > Translations > right-click > Extra > Export. Import the translations in the same way.
-
Direct access - Grant the translator direct access only to the screens Translations, Translation objects, and Help in the Software Factory. Translators are not allowed to create translation objects. You can grant access by using the default available user group and role. In IAM:
- Create a user (menu Authorization > Users).
- Add the user to the translation_management user group (menu Authorization > User groups > tab List > tab Users). See also Add users to a user group.
- Assign the Translation management role to the translation_management user group (menu Authorization > Applications > tab Authorization settings > tab Authorization). See also Grant a user group access to the application.
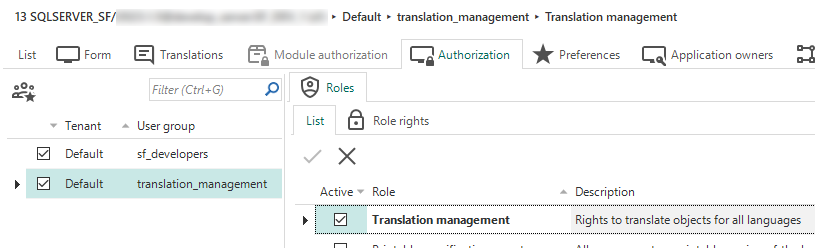 Grant an external translator access to the Translations screen
Delete unused translation objects
To delete unused translation objects for the entire branch:
menu User interface > Translations > tab Translations
- Execute the task Delete unused translation objects
 .
.