Columns
Introduction to columns
This chapter contains the options for a column in the Subjects tab.
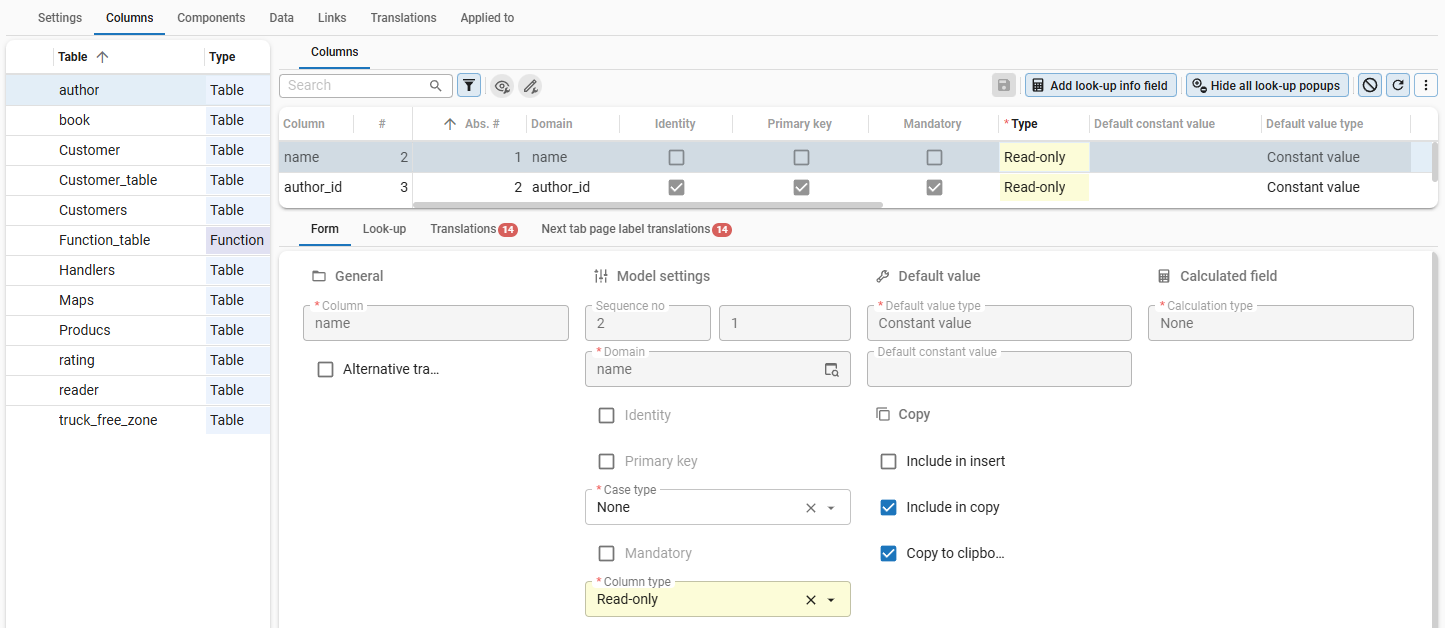 Overview of the Columns tab on the Subjects tab
Model settings
Case type
menu User interface > Subjects > tab Default/Variant > tab Columns > tab Form > tab Column
The Case type setting determines the capitalization of the text entered in this field. The available options are:
- None
- Upper case
- Lower case
- Initial caps
- Proper case.
>Oracle and DB2 Indicium applies an UPPER function when sorting alphanumeric columns.
This ensures consistent sorting results on case-sensitive data platforms but can slow down sorting on indexed columns.
To speed up sorting, set the Case type of columns with uppercase data to Upper case. This skips Indicium's unnecessary UPPER function.
Type of column
menu User interface > Subjects > tab Default/Variant > tab Columns > tab Form > tab Column
The Column type determines whether the field is presented as:
- Editable
- Readonly
- Hidden.
The type can be defined differently in the grid and the form. However, the column defines the most unrestricted level.
The field added_by is set to readonly. It is possible to hide this in the grid. It is, however, not possible to make this normal in the form.
Copy
Include in insert
It is possible to configure a column so that a newly added row contains copied or consecutive information from the selected row. The following rules apply:
- The column must be marked as Include in insert.
- At least one marked column must be part of the current subject sorting.
- Only the columns that are marked and part of the sorting are automatically filled in the new record.
- The new record is inserted near the selected row.
The value is transferred from the selected row to the default procedure that determines the value in the new row.
Examples:
- To add a new record to the same parent as the selected record, you must mark the column
parent_node_idas Include in insert. The grid must be sorted by parent. - To add a new record with a successive order number, you must mark the column
order_noas Include in insert. The grid must be sorted by order number.
To mark a column as Inlcude in insert:
menu User interface > Subjects > tab Default/Variant > tab Columns > tab Form > tab Column
- Select the checkbox Include in insert.
Include in copy
menu User interface > Subjects > tab Default/Variant > tab Columns > tab Form > tab Column
A record can be copied easily with [Ctrl]+[Alt]+[Plus], but this shouldn't always be possible for all fields. For example, for identity fields, status fields, and trace columns. With Include in copy, you can indicate if a field needs to be transferred when copying a row.
Copy to clipboard / Export
menu User interface > Subjects > tab Default/Variant > tab Columns > tab Form > tab Column
If Copy to clipboard / Export is selected, it is possible to copy rows from the grid with Ctrl + C.
In a data export, only columns for which Copy to clipboard / Export is selected will be exported.
Exclude columns from logic
Logic concepts are added to or removed from a subject in the menu User interface > Subjects > tab Default/Variants > tab Settings > tab Performance. For certain logic concepts, all columns are automatically added as parameters.
It is possible to exclude columns that are not required for specific logic concepts. The primary reason for excluding columns is to enhance performance. You can, for example, exclude HTML, RTF, or binary columns that may contain a lot of data but are not necessary in your code. Validations are in place to alert you to this situation.
To exclude columns from a logic concept:
menu User interface > Subjects > tab Default/Variants > tab Columns > tab Form > tab Performance
-
Exclude columns that are not required for the following logic concepts:
- Default
- Layout
- Context
- Handler - See Exclude columns from handler logic
- Trigger
See also: An overview of the available logic concepts.
In each default, the Modified by field is filled with the current user. However, for some tables, the default is empty. You cannot turn off the default because then, Modified by will no longer be filled, but you can turn off the unused fields. Fewer data will be transmitted during the execution, so the performance will increase.
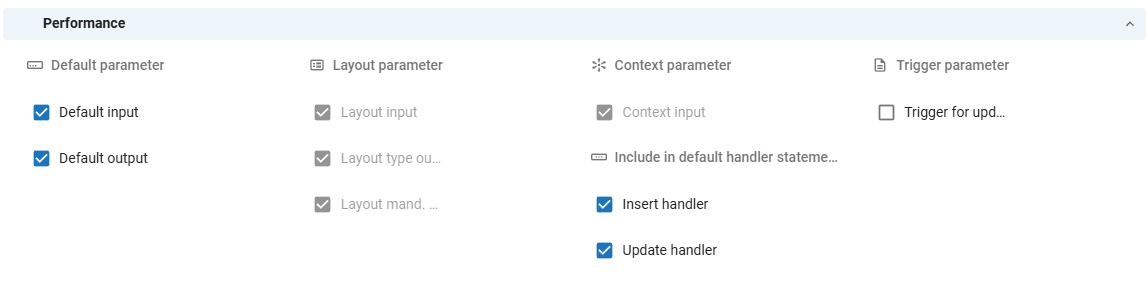 Performance settings for columns
Configure a column lookup
A lookup allows users to select or view a value from a field in an associated table. For each field, you can configure whether a lookup should be displayed, what reference the lookup should use, and how users select a value. You can set up the default settings for a table in Default lookup display settings.
To configure a lookup for a column:
menu User interface > Subjects > tab Default/Variants > tab Columns > tab Look-up
-
Select the checkbox Show look-up to make the required fields available.
noteWhen Show look-up is selected, but no Reference ID filled, then two (or more) references are created. Select the correct table or reference.
-
Select the Reference of the lookup.
To further configure the lookup:
-
Select a Look-up control to configure how the lookup is displayed for the user. The following options are available:
- Auto complete - when typing, the first record that matches the input of the user is displayed automatically.
- Combo (alphabetical) - a value from a combo box can be selected. The list is sorted alphabetically.
- Combo (sorted) - a value from a combo box can be selected. The list is sorted according to the default sorting of the look-up subject.
- Suggestions (contains) - When typing, values containing the input are presented. On a mobile device, a keyboard opens.
- Suggestions (starts with) - When typing, values starting with the input are presented. On a mobile device, a keyboard opens.
When a new table is created, the default lookup control is set to Suggestions (starts with), since this ensures better performance when returning a large number of rows from a lookup table.
tipFor tables with a small dataset, a Combo lookup control may be suitable, since it displays all available values from a lookup table in a drop-down list. For tables with larger datasets, other options like Suggestions (contains) may be more suitable, since this lookup control allows users to search for a value.
-
Optional. You can create a custom look-up by selecting the checkbox Custom look-up. You can use this setting to override the default lookup control and lookup display column.
You can select an alternative Display column, which determines what field is shown to the user when they use the lookup. For example, the default settings for a display column could be to display the customer_name. By using a custom display column, you can set the lookup to display customer_fullname instead.
To configure the settings for the Display column, select the lookup control
 and go to tab Form.
The following settings are available:
and go to tab Form.
The following settings are available: -
Optional. Select the checkbox Look-up has popup to display the look-up table in a pop-up window.
- Optional. Select a Look-up table variant to display a variant of the lookup table.
You can filter what is shown in a lookup by adding a prefilter to the lookup table. You can achieve this by setting the Look-up state to On, On hidden or On locked. A prefilter is then applied when the lookup is opened, and depending on the Look-up state, it can be modified by the user.
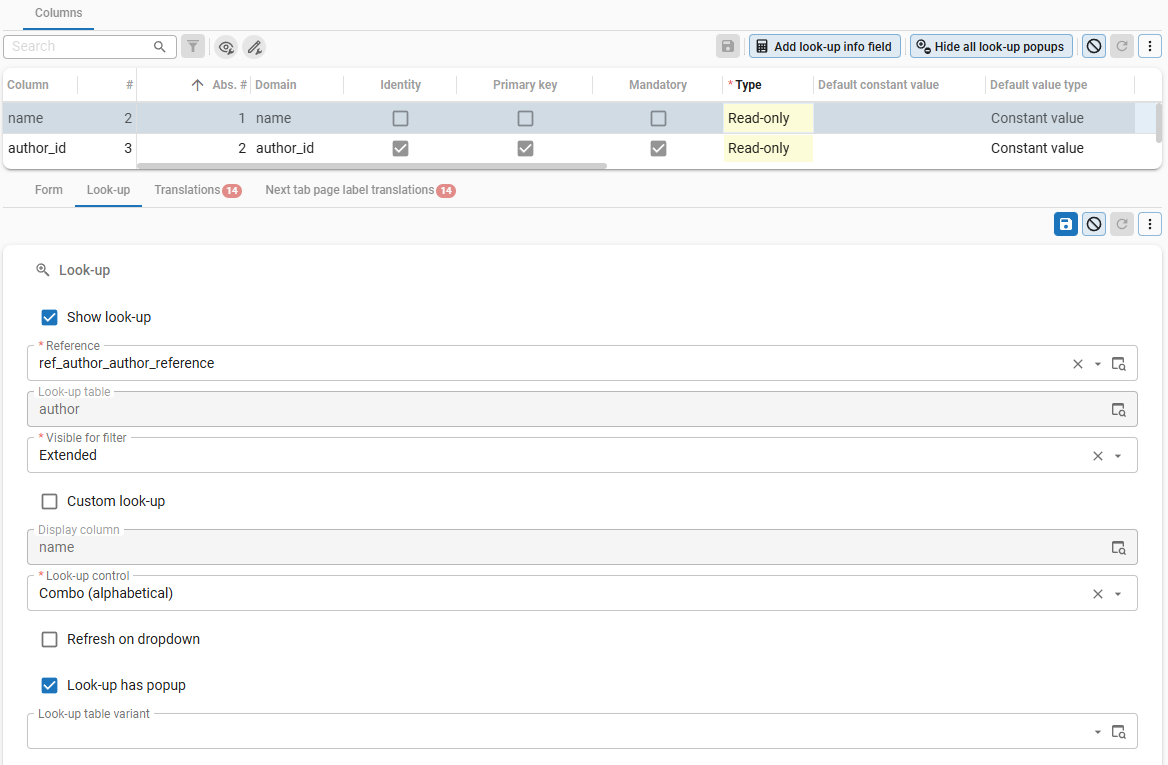 Lookup settings for tables