IIS Administration API
Introduction to IIS Administration API
This manual describes the steps needed to install and configure the Microsoft IIS Administration API on an IIS webserver. The Microsoft IIS Administration API is a REST service built by Microsoft which allows users and programs to administer changes to IIS webservers without requiring direct access to the machine itself.
The Thinkwise Deployment Center can use this service to deploy the Universal GUI and Indicium service tiers.
This manual describes the basic setup needed to get the service up and running for use with the Thinkwise Deployment Center. For more information about the IIS Administration API, why to use it, its advanced configuration (such as installation on Nano Server), or additional insight on how the API works, refer to:
- the GitHub repository
- the official Microsoft documentation
- the blogs
Installation
To install the Microsoft IIS Administration API service:
-
Navigate to https://github.com/microsoft/IIS.Administration/releases and download
IISAdministrationSetup.exefrom the latest release. For the best compatibility with the Thinkwise Deployment Center, it is recommended to use version 6.0.0 (or higher if available). -
Run this installer on the Windows Server machine whose IIS instance you wish to deploy the Universal GUI or Indicium service tier to.
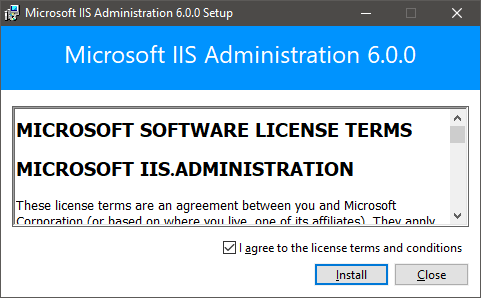 Installer
After running the installer the system will have been changed to include the following:
- The .NET Core runtime required for the service to function.
- The files of the service are installed to
%PROGRAMFILES%\IIS Administration. - A Windows service called
Microsoft IIS Administrationrunning under the Local System account. - A binding on port
55539with the service's SSL certificate.
Windows service entry installed for the Microsoft IIS Administration API
- To test if the service installed correctly, visit https://localhost:55539. A page asking for an access token to connect to the service should be visible.
The service is only available using https.
By default it uses a self-signed certificate created for use with localhost.
Any browser will probably warn you that the certificate is invalid for this reason but for now you can choose to temporarily ignore this warning.
To assign your own, valid, SSL certificate see the SSL Certificate section.
The Thinkwise Deployment Center provides a way to trust an invalid certificate based on the SHA-1 thumbprint should you choose to ignore this step.
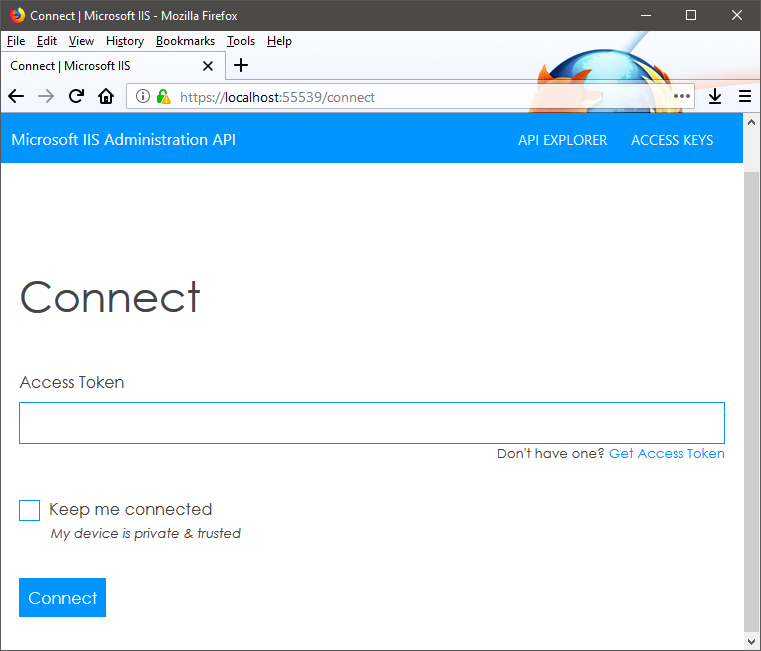 Initial screen of a successfully installed service
Configuration
This section describes the steps needed to correctly configure the Microsoft IIS Administration API service for use with the Thinkwise Deployment Center.
Configuration file
All configurable features of the Microsoft IIS Administration API are handled through a file named appsettings.json.
This file (for version 6.0.0) is located in the following directory:
- %PROGRAMFILES%\IIS Administration\6.0.0\Microsoft.IIS.Administration\config
 Appsettings.json configuration file location
Do not forget to open the editor you'll be using to add changes as an administrator or you won't be able to save the file since it is located in Program Files.
Also remember to restart the Microsoft IIS Administration Windows service after making the desired changes to this file so the service is updated to use them.
Making the config file editable
Right after a fresh installation or upgrade, the appsettings.json file cannot be immediately edited.
You'll also not be able to change read/write permissions.
This is because the file's initial owner is the SYSTEM account of the machine.
To change the owner and permissions of the file so it can be edited perform the following steps (you'll need administrative permissions to do this).
-
Right click the
appsettings.jsonfile and selectProperties. -
Go to the
Securitytab and clickAdvanced.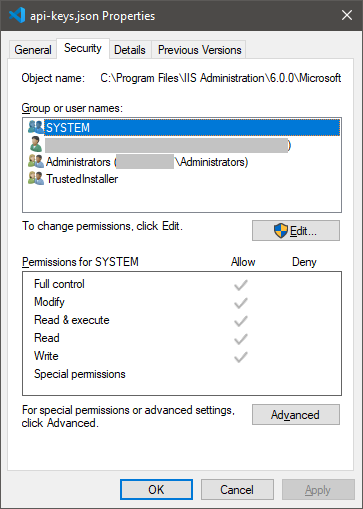 Click 'Advanced' in Properties -> Security
 -
Click
Changeto select a new Windows account as the owner of this file.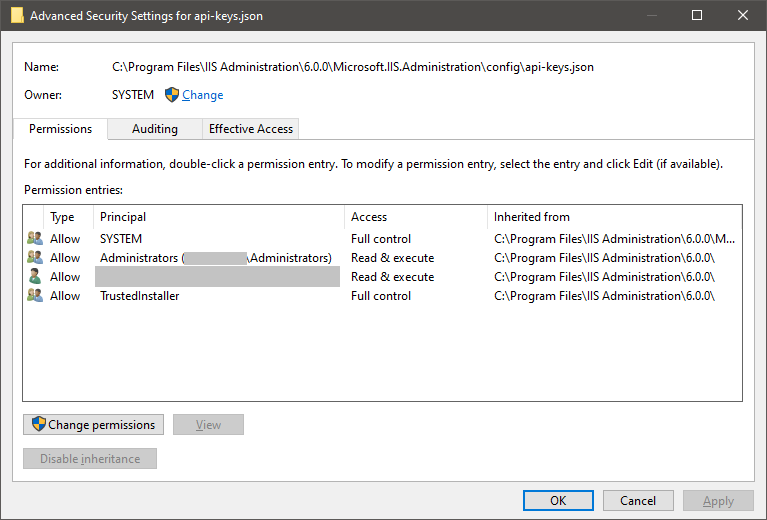 Click 'Change' to modify the owner account of the appsettings.json file
 -
After you've selected the new owner click
Apply. -
Re-open the
Propertieswindow and go to theSecuritytab again. -
Click
Edit...and give the users that need to modify the file theModifypermissions.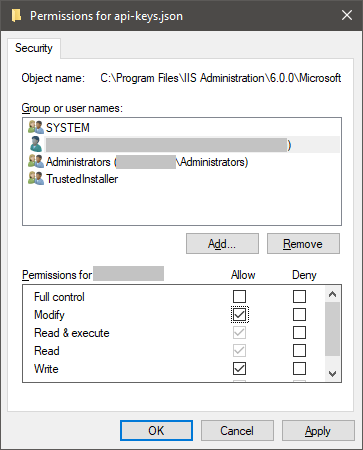 Grant the user or group that needs to be able to modify the configuration 'Modify' permissions
 -
Click
Applyto confirm the edit you've just made. -
Optional: Change the owner back to
SYSTEMif you want.
Security
This section describes how to modify the appsettings.json configuration file to:
- Grant users access to the API.
- Granting the API to access parts of the file system.
- Configuring logging and auditing options
This guide is limited to describing the minimum needed to get up and running with the Thinkwise Deployment Center. For a more detailed description on certain json property values consult the Application Settings section of the official documentation.
User Access
The only user who is able to access the service's site by default is the Windows user that installed the service.
To grant other Windows users access they must be added to the security.users.administrators section of the appsettings.json file.
Default
"security": {
    "require_windows_authentication": true,
    "users": {
      "administrators": [
        "exampledomain\\installUser"
      ],
      "owners": [
        "exampledomain\\installUser"
      ]
    }
}
New user added
"security": {
    "require_windows_authentication": true,
    "users": {
      "administrators": [
        "exampledomain\\installUser",
        "exampledomain\\someAdminUser"
      ],
      "owners": [
        "exampledomain\\installUser"
      ]
    }
}
This allows the new user exampledomain\\someAdminUser to access the API section of the service using a generated access key.
Additional configuration
If you want to distinguish between users that are allowed to generate access keys and ones that are not, you can add another group
(with a name of your choosing) to the security.users section:
"security": {
  "users": {
    "apiusers": [
      "exampledomain\\installUser",
      "exampledomain\\someAdminUser",
      "exampledomain\\someLesserAdminUser"
    ],
    "administrators": [
      "exampledomain\\installUser",
      "exampledomain\\someAdminUser"
    ],
    "owners": [
      "exampledomain\\installUser"
    ]
  }
}
Then change the security.access_policy.api section to use the new group for API access:
"security": {
  "access_policy": {
    "api": {
      "users": "apiusers",
      "access_key": true
    },
    "api_keys": {
      "users": "administrators",
      "access_key": false
    },
    "system": {
      "users": "owners",
      "access_key": true
    }
  }
}
This will allow users defined in the apiusers group to use the api with an access key but only users that are in the administrators group
are allowed to generate those keys for them.
So in the example above exampledomain\\someLesserAdminUser has access to the API section of the service but only exampledomain\\someAdminUser
and exampledomain\\installUser are able to generate the key that exampledomain\\someLesserAdminUser needs to use the service.
File Access
The API service does not grant administrators access to manipulate the files on the IIS webserver by default.
This, however, is required by the Thinkwise Deployment Center to be able to create directories for new sites and uploading files needed by the Indicium Service Tier.
To grant authenticated users read and write permissions for certain directories on the file system add a files.locations section to the appsettings.json file:
Example with inetpub
"files": {
  "locations": [
    {
      "alias": "Inetpub",
      "path": "C:\\inetpub",
      "claims": [
        "read",
        "write"
      ]
    }
  ]
}
You can also use environment variables in the path if you'd want to:
"files": {
  "locations": [
    {
      "alias": "Inetpub",
      "path": "%systemdrive%\\inetpub",
      "claims": [
        "read",
        "write"
      ]
    }
  ]
}
Both these examples would give users of the API access to modify files inside C:\\inetpub (if %systemdrive% pointed to C:) through the API.
Of course, you can add as many locations as you want and only grant access to specific sub directories:
"files": {
  "locations": [
    {
      "alias": "Inetpub",
      "path": "%systemdrive%\\inetpub",
      "claims": [
        "read",
        "write"
      ]
    },
    {
      "alias": "SomeLocationOnDDrive",
      "path": "D:\\Somedir\\somesubdir",
      "claims": [
          "read",
          "write"
      ]
    }
  ]
}
Logging and Auditing
Logging and auditing of requests made to the API are configured in the logging and auditing sections of the appsettings.json file.
Logging and auditing files are saved in:
- %PROGRAMFILES%\IIS Administration\logs
Example
"logging": {
  "enabled": true,
  "min_level": "error", // Available levels from most to least logging output: trace, debug, information, warning, error, fatal.
  "file_name": "log-{Date}.txt"
},
"auditing": {
  "enabled": true,
  "file_name": "audit-{Date}.txt"
}
Bindings
This section describes how to change the service's IP + port binding. It also provides a guide on how to bind your own SSL certificate to the service.
If left unchanged, the service uses https://*:55539 as it's IP + port binding and a self-signed certificate created during installation.
It is not possible to change the binding to use http instead of https.
Host and Port
To change the host or port number an urls value needs to be added to the appsettings.json file on the same level as security or files sections etc.
{
  "urls": "https://*:54321"
}
This example changes the service to try and bind to all available IP addresses and port number 54321.
Should you change the port number remember to also register the proper SSL certificate to that port.
SSL Certificate
The service uses its own self-signed certificate when it is initially installed.
Since it is self-signed it is also considered to be an invalid certificate.
This means that browsers will display a warning when connecting to the service because invalid certificates are not trusted by default. The Thinkwise Deployment Center will also refuse to connect to services with invalid certificates unless it is specifically asked to trust the certificate's SHA-1 thumbprint.
So while you could use and work around the fact that the default certificate is self-signed it would be better to bind the service to a valid certificate.
If you do not have such a certificate consider setting up Let`s Encrypt to get a free one.
Another alternative to getting a valid certificate is to create a self-signed one using a tool like MakeCert or New-SelfSignedCertificate in powershell and installing it into the certificate store of the machines that need to trust it as a valid one.
 Example of creating a self-signed cert using New-SelfSignedCertificate
Binding the new certificate to the service can be done by using Windows's netsh utility and following these steps:
This example assumes the default binding of the service has not been changed.
The images are also only there to provide visual aid of the process.
Do not copy the values used inside them because they will be different from your own situation.
For more information on netsh commands visit the
official Microsoft documentation page.
-
Make sure you've installed the certificate on the machine.
-
Open a
cmdorpowershellwindow as an administrator. -
Run
netsh http show sslcert ipport=0.0.0.0:55539to find out what the service's application ID is and optionally note the current certificate hash in case you want to change it back for whatever reason.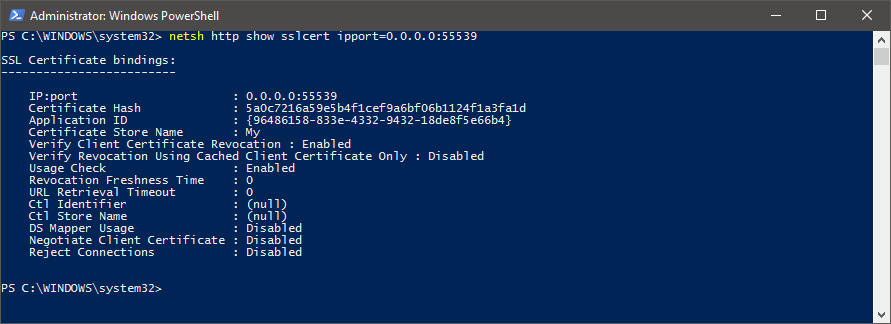 Finding out what the application ID and original hash are
 -
Run
netsh http delete sslcert ipport=0.0.0.0:55539to remove the current certificate from the binding.Delete the current certificate
-
Check what the valid certificate's thumbprint hash is.
-
Run
netsh http add sslcert ipport=0.0.0.0:55539 certhash=<insert cert thumbprint here> appid=<insert app ID GUID here>using the thumbprint hash of the valid certificate and the application ID you retrieved earlier.Adding the new certificate to the binding
The certificate should now be bound to port 55539.
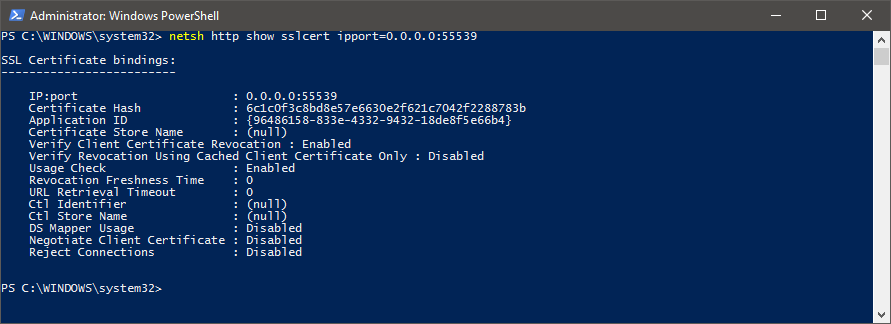 New certificate bound to the IP and port