Load balancing
Load balancing with Azure Application Gateway
This chapter explains how to use the Azure portal to create an application gateway and check if it is working correctly. Before you create the application gateway, make sure that the following is available in your environment:
- A resource group
- A virtual network
- At least one app service up-and-running.
The picture below shows the components you need for the application gateway.
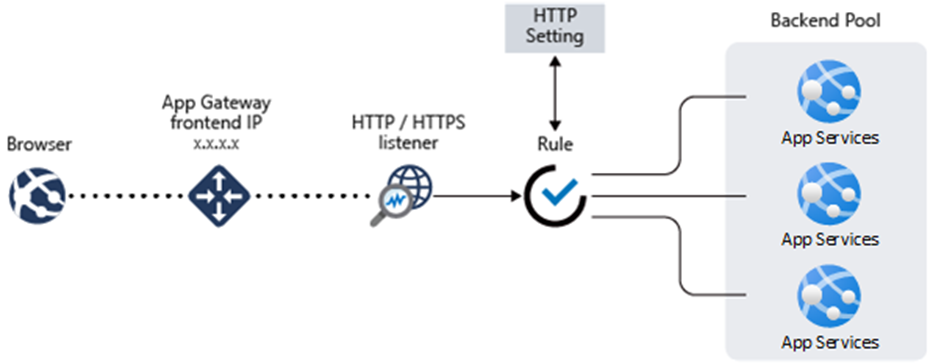 The components you need for the application gateway
Deploy the application gateway
-
Log in to your Azure Portal.
-
Click on Create a new resource.
-
Select Application Gateway and click on Create.
-
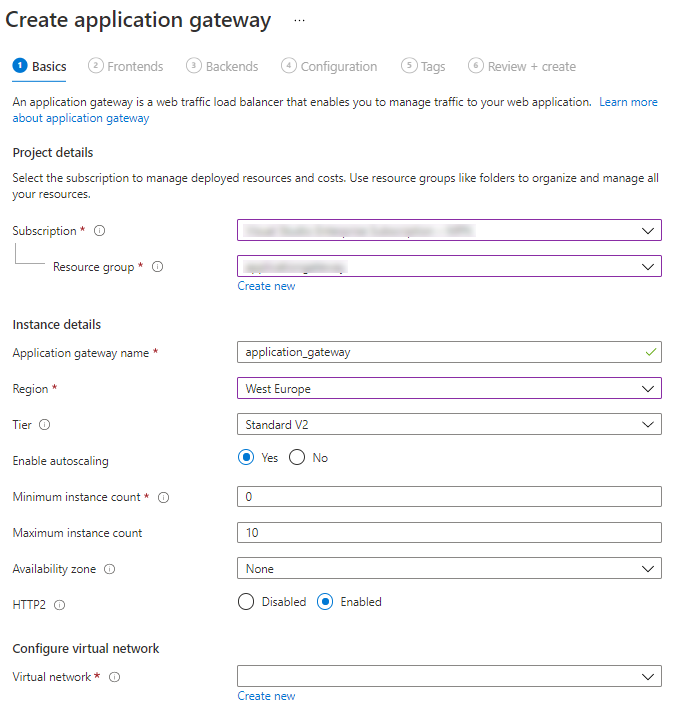
In tab Basics, enter the following application gateway settings:
Field Description Resource group Select the resource group where you wish to store your application gateway. If the resource group does not yet exist, select Create new to create it. Application gateway name Enter a name for your application gateway. Region Select the same region as you are using for the Azure App Service. Tier In this scenario, select 'Standard V2'. These tiers are backed by Microsoft's SLA of 99.95% availability and have various optimizations in terms of auto-scaling, zone redundancy, faster provisioning, and performance. Enable autoscaling Select Yes. Autoscaling mode is beneficial in applications with varying traffic. The autoscaling SKU can scale out or in based on changing traffic load patterns. This removes the need to choose a deployment size or instance count during provisioning and offers true elasticity.
In the 'Standard V2' and 'WAF V2' SKU, the application gateway can operate both in fixed capacity- and autoscaling mode. Fixed capacity mode is useful for scenarios with consistent and predictable workloads.TCP idle timeout Governs how long a TCP connection is kept open in case of no activity. It has a four-minute default on the frontend virtual IP (VIP) of the application gateway, but you can set it to anywhere between four and thirty minutes in the Azure Portal. Navigate to the Public IP of the application gateway, menu Configuration. Minimum and maximum instance count Keep the default settings. Availability zone Keep the default setting. An application gateway can span multiple availability zones. This setting removes the need to provision separate application gateway instances in each zone with a Traffic Manager. You can choose a single zone or multiple zones where application gateway instances are deployed, making it more resilient to zone failure. The backend pool for applications can be similarly distributed across availability zones. HTTP2 Select Enabled. HTTP2 works with Thinkwise's GUIs and performs better than HTTP1.
 Create an application gateway
Configure the Virtual Network
Azure needs a virtual network to communicate with the resources you create. The application gateway instance also needs a separate subnet, other than the default subnet.
This topic explains how to create a new virtual network ('vn_appgateway') and two subnets ('default' and 'sn_appgateway'). One subnet is for the application gateway, the other for the backend servers.
-
In the Basics tab, in the field Virtual network, click on Create new.
-
Enter the Name ('vn_appgateway').
Under Subnets, the 'default' subnet is already available.
-
Enter the 'sn_appgateway' subnet and its Address range (the same as the default).
-
Keep the default values for the other settings.
-
Click on OK to return to the Basics tab.
The Virtual network and Subnet are added automatically to the Basics tab.
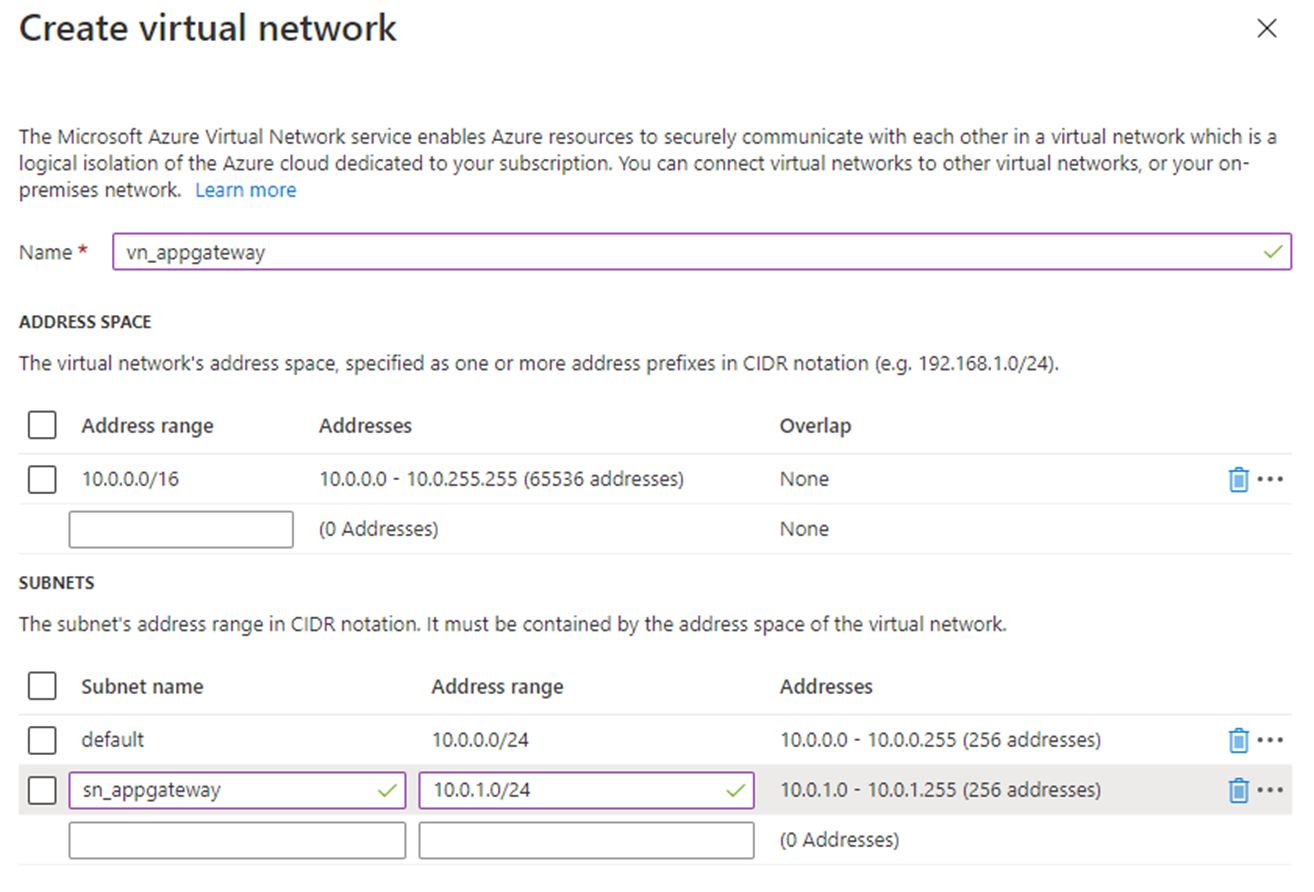 Configure the virtual network
Configure the frontend
- Navigate to the Frontends tab.
- Verify that the Frontend IP address type is set to Public.
You can configure the frontend IP to be Public or Private depending on your use case. In this topic, a public frontend IP is created so it can be approached externally (from the Internet).
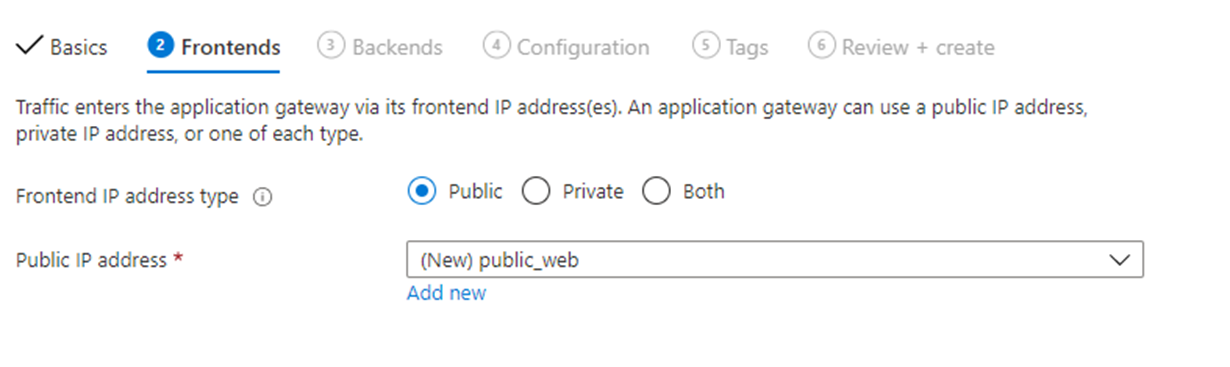 Public frontend ID
- In the field Public IP address, select Add new, enter a Name, and click on OK.
A listener is also associated with this IP address.
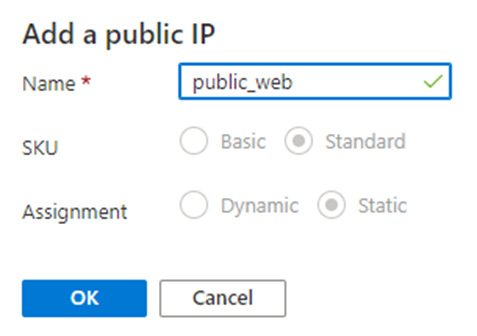 Add a public ID
Create a backend pool
Now, create a backend pool.
A backend pool is used to route requests to the backend servers that serve the request. They can be composed of NICs, virtual machine scale sets, public IPs, internal IPs, fully qualified domain names (FQDN), and multi-tenant backends, like Azure App Service.
- Navigate to the Backends tab.
- Click on Add a backend pool.
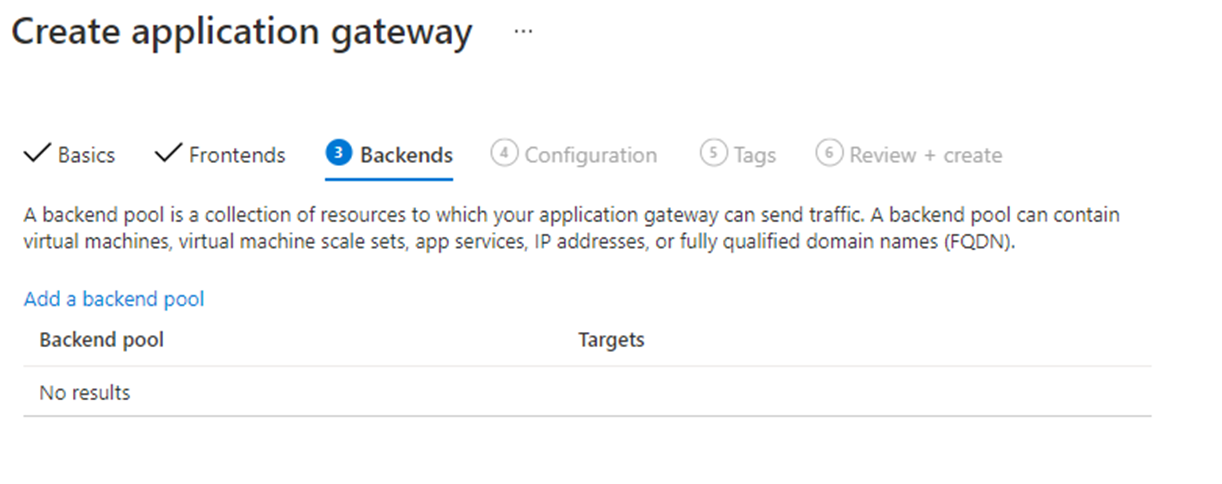 Add a backend pool
-
Enter the following values to create an empty backend pool:
Field Description Name Enter a name for the backend pool. Target type Select App services. Target Enter the app service to where you wish to connect. -
Click on Add.
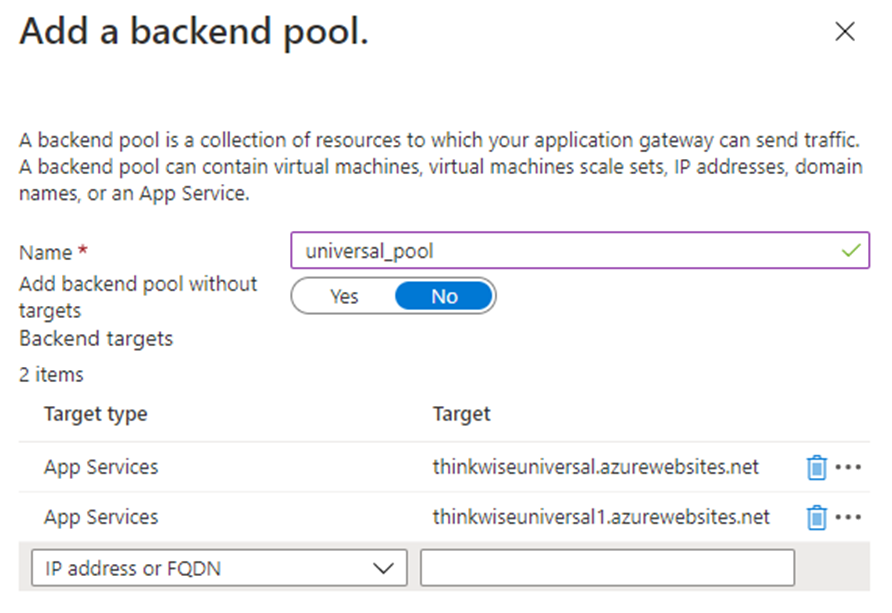 Example: backend pool for Universal GUI
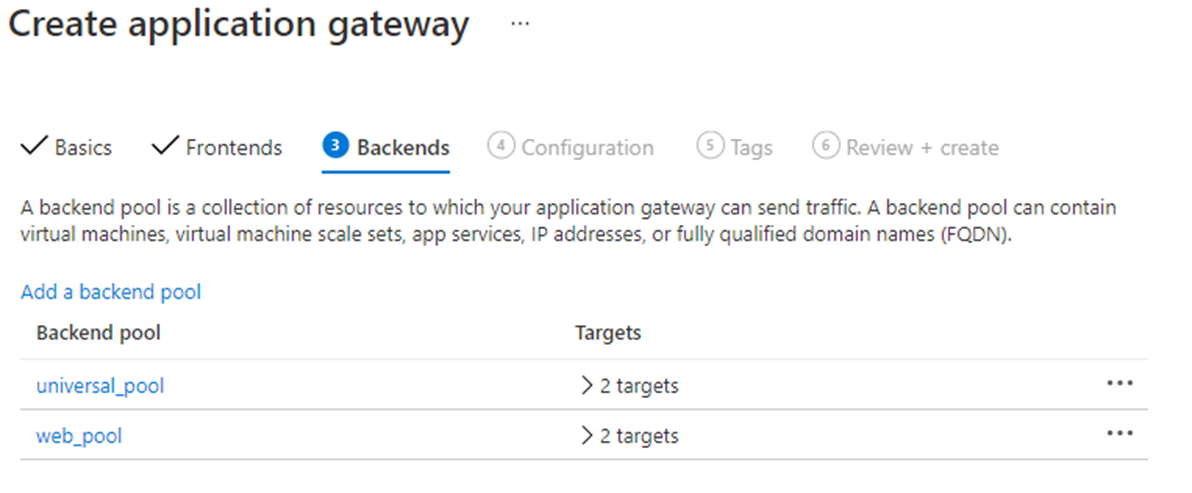 Example: an overview of backend pools
Create a routing rule
Now, connect the frontend to your backend pools using a routing rule. This is the most important part since it tells the application gateway exactly what to do:
- Traffic comes into a Listener.
- The HTTP(s) Settings determine how to forward that traffic to the backend pool.
- The backend pool lists the web servers that host the site.
- Navigate to the Configuration tab.
- Click on Add a routing rule.
- Enter a Rule name.
A routing rule requires a listener. The listener determines how to forward the traffic to the backend pool.
Only one listener can be attached to one rule.
-
In the Listener tab, enter the following values for the listener:
Field Description Listener name Enter the name of the listener. Frontend IP Select 'Public' to choose the public IP you have created for the frontend. Protocol 'HTTP' or 'HTTPS'. For 'HTTPS', a certificate is required. You can upload a certificate or use a certificate from the Azure Key Vault. For more information, check Key Vault certificates. Port Enter '80' for HTTP or '443' for HTTPS. Additional settings Keep the default values. -
Open the Backend targets tab to configure the rest of the routing rule.
-
Select the Backend target.
| Field | Description |
|---|---|
| HTTP settings | Click on Add new to create an HTTP setting. This setting determines the behavior of the routing rule. |
| In the Add an HTTP setting window: | |
| HTTP settings name | Enter the name for the HTTP setting. |
| Backend protocol | HTTP or HTTPS. |
| Backend port | '80' for HTTP or '443' for HTTPS. |
| Additional settings: | |
| Cookie-based affinity | The application gateway can use cookies to keep a user session on the same server. You can enable this feature if the client supports the use of cookies. |
| Affinity cookie name | Name of the affinity cookie. |
| Connection draining | Connection draining helps to achieve graceful removal of backend pool members during planned service updates. It can be applied to all members of a backend pool during rule creation. Once enabled, the application gateway ensures all deregistering instances of a backend pool do not receive any new requests while allowing existing requests to complete within a configured time limit. This applies to both backend instances explicitly removed from the backend pool by a user configuration change and backend instances reported as unhealthy as determined by the health probes. The only exceptions are requests bound for deregistering instances, which have been deregistered explicitly because of gateway-managed session affinity and continue to be proxied to the deregistering instances. |
| Request time-out (seconds) | The number of seconds the application gateway will wait to receive a response from the backend pool before it returns a “connection timed out” error message. |
| Override backend path | This allows you to override the path in the URL, so the requests for a specific path can be routed to another path. |
| Host name settings: | |
| Override with new host name | Yes. |
| Host name override | Select Pick host name from backend target. |
| Create custom probes | To use a custom probe, you must first create a health probe. |
- Click on Add to save the HTTP settings and return to the Add a routing rule window.
- There, click on Add to save the routing rule and return to the Configuration tab.
Review and create
- Navigate to the Review + create tab.
- Review the settings and click on Create to create the virtual network, the public IP address, and the application gateway. It may take several minutes for Azure to complete.
Load balancing with Azure Front Door
Azure Front Door is an Application Delivery Network (ADN) as a service, offering various layer 7 load-balancing capabilities for your applications. For more information about Azure Front Door, look at https://docs.microsoft.com/en-us/azure/frontdoor/.
If you want to use Azure Front Door in front of Indicium, you must specify reverse proxy settings to redirect URIs to your custom Universal GUI domain instead of the default *.azurewebsites.net domain.
You can specify these reverse proxy settings in the appsettings.json configuration file, as follows:
  "ReverseProxy": {
   "Enabled": true,
   "AllowedHeaders": [
      "All"
   ],
   "KnownNetworks": [
      "147.243.0.0/16",
      "2a01:111:2050::/44"
   ]
}
You can also update the appsettings.json configuration file by editing app settings in bulk in the Azure Portal.
In the Azure portal, the json code is:
  {
    "name": "ReverseProxy__AllowedHeaders__0",
    "value": "All",
    "slotSetting": true
  },
  {
    "name": "ReverseProxy__Enabled",
    "value": "true",
    "slotSetting": true
  },
  {
    "name": "ReverseProxy__KnownNetworks__0",
    "value": "147.243.0.0/16",
    "slotSetting": true
  },
  {
    "name": "ReverseProxy__KnownNetworks__1",
    "value": "2a01:111:2050::/44",
    "slotSetting": true
  }