Azure setup
Introduction to Azure setup
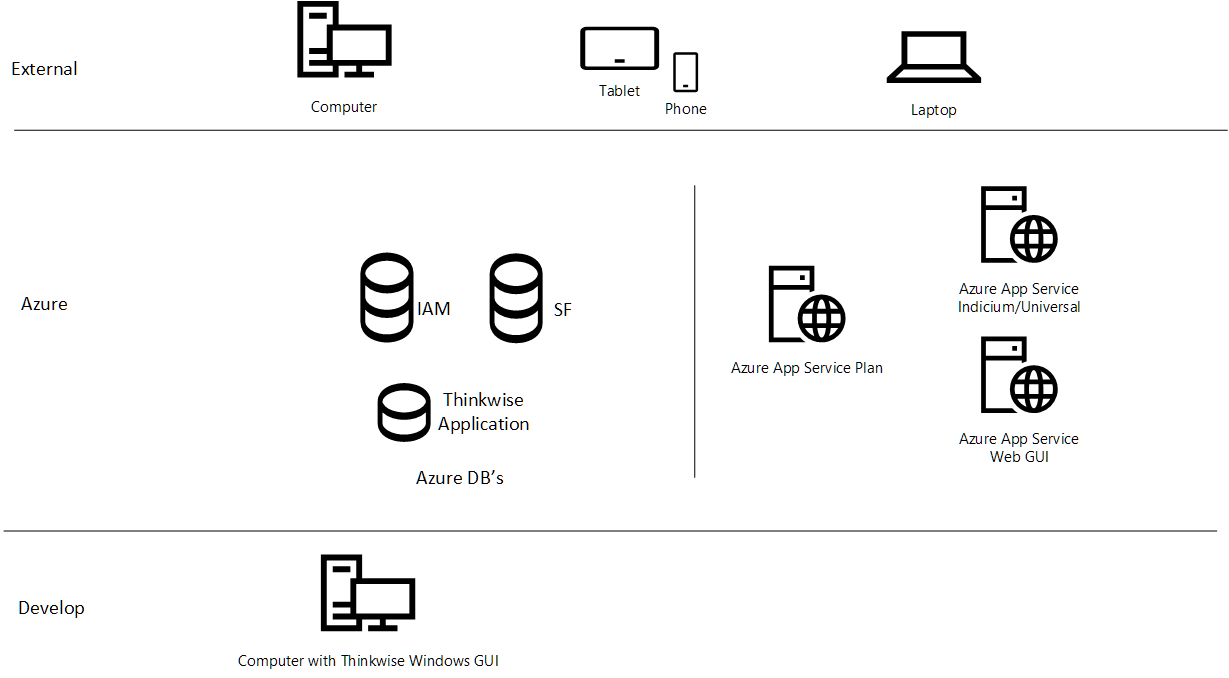
This document provides instructions for setting up an Azure environment for the Thinkwise Platform.
- The Intelligent Application Manager (IAM) database and, optionally, the Software Factory (SF) database are installed on Azure SQL Server.
- The Thinkwise Web GUI, Universal GUI and Indicium service tier are installed on Azure App Service.
For Azure authentication settings in IAM, see Authentication in IAM.
Prerequisites
Prerequisites for deploying the Web GUI or the Universal GUI with Indicium on Azure App Service are:
- An Azure Account. You can create one for free here.
- An active Azure subscription. Instructions on how to create a new subscription can be found here.
- An Azure base environment that has .NET 8 installed.
Azure infrastructure
It is your own organization's responsibility to take adequate security measures for protecting your cloud environment. Thinkwise products have been tested thoroughly, including pen testing, to ensure their security.
- Use Azure DB for hosting the Software Factory, IAM and the developed application database.
- Use Azure Web Services for hosting Indicium, the Universal GUI, or the Web GUI.
 Example: Azure
Security settings for Azure
For general information about setting up security, see Security
Creating an Azure SQL server (logical server)
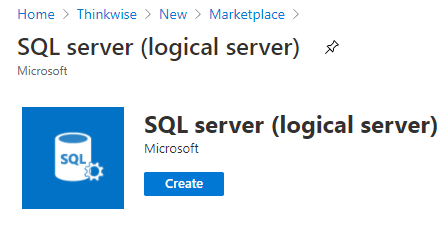
In the Azure Portal, select Create a resource and search for "SQL server" to create a new SQL server (logical server) service.
screenshot: Create a new SQL server (logical server)
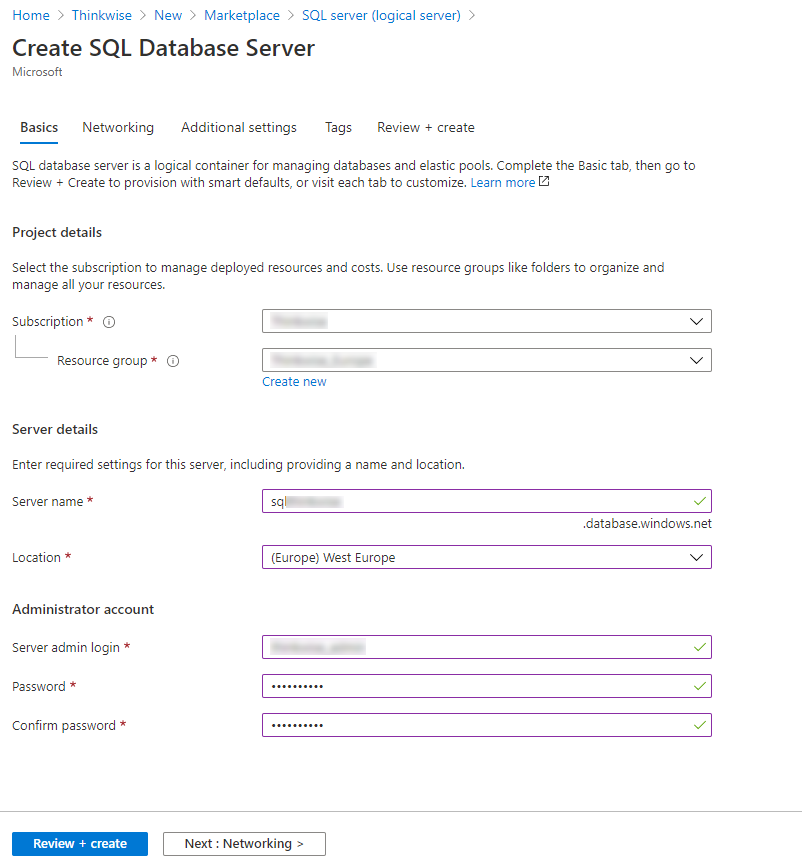
The Azure portal provides a wizard to create a SQL server. This wizard requires the following fields:
| Field | Description |
|---|---|
| Subscription | A valid and active Azure subscription. |
| Resource group | A valid resource group. |
| Server name | The name of the SQL server. This name must be unique among all Azure SQL servers in the world |
| Location | Choose location of the SQL server in the world |
| Server admin login | The admin login for the SQL server. (RDBMS) |
| Password | Password of the admin login |
| Confirm password | Confirm password of the admin login |
Fill out the fields and click Next on the following tab pages to accept the default settings.
screenshot: Fields to create an SQL server
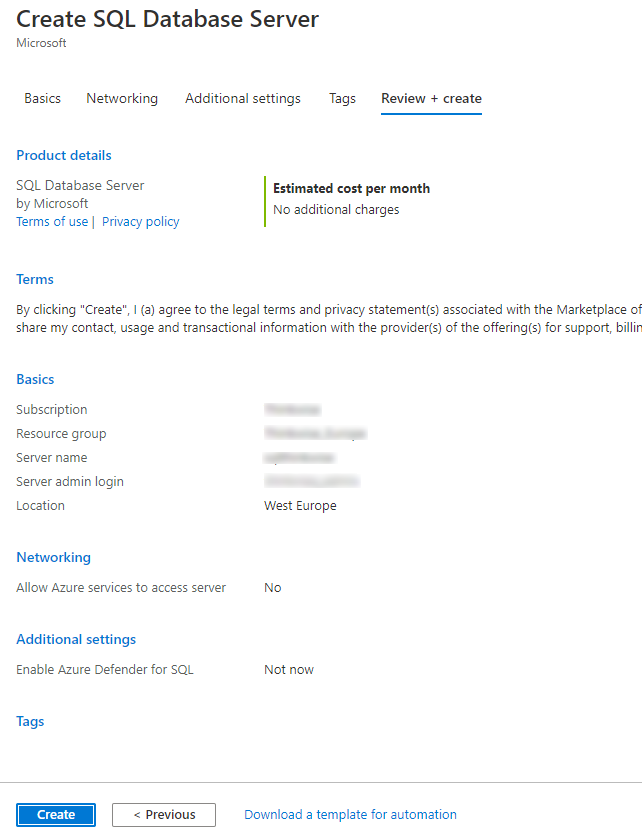
Click Create to create the Azure SQL server.
screenshot: Create the SQL server
Network settings
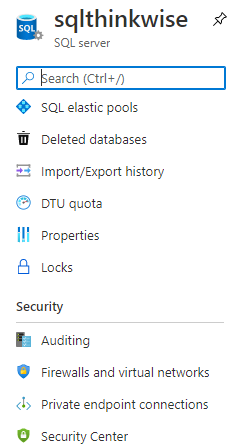
Go to the Azure SQL server service and click Firewalls and virtual networks under Security.
screenshot: Firewalls and virtual networks
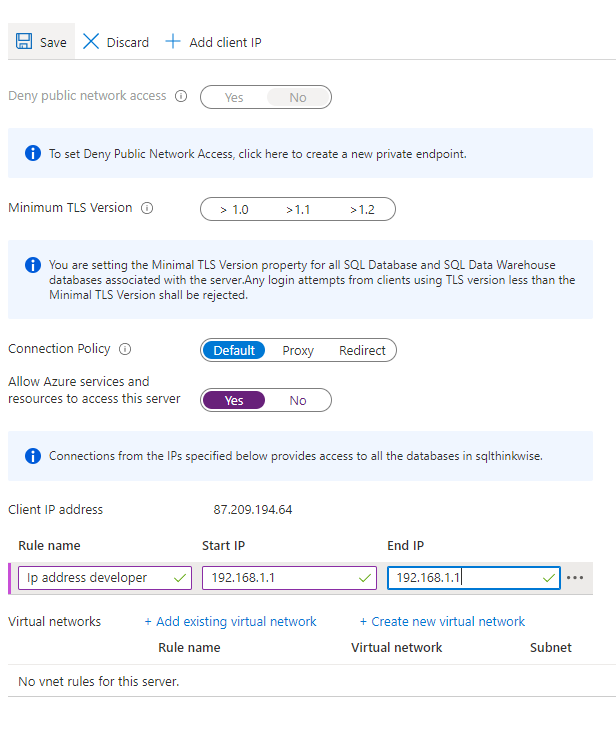
Set Allow Azure services and resources to access this server to Yes. To connect through SMSS with the Azure SQL server, fill in the IP address range of the developers who needs access. Click Save.
screenshot: Allow Azure services and resources
Store database user credentials securely
To store database user credentials securely in the Azure Indicium Web App service:
- In the Azure portal, select the Application settings tab.
- Add the following new Application settings and specify the desired values.
- MetaSourceConnection__Database
- MetaSourceConnection__PoolPassword
- MetaSourceConnection__PoolUserName
- MetaSourceConnection__Server
These setting names contain double underscores.
screenshot: Application settings

The appsettings.json configuration file can be configured as follows:
{
  "Logging": {
    "ApplicationInsights": {
      "LogLevel": {
        "Default": "Information",
        "System": "Information",
        "Microsoft": "Warning",
        "Indicium": "Debug"
      }
    },
    "IncludeScopes": false,
    "LogLevel": {
      "Default": "Information",
      "System": "Information",
      "Microsoft": "Warning",
      "Indicium": "Debug"
    }
  },
  "MetaSourceConnection": {
    "Server": "",
    "Database": "",
    "PoolUserName": "",
    "PoolPassword": ""
  }
}
Deploy the Thinkwise IAM database
-
Download the Thinkwise Installation package from the Thinkwise Community Portal. For more information, see Getting started in the Thinkwise Deployment Center guide.
-
Select Install on the IAM product page.
-
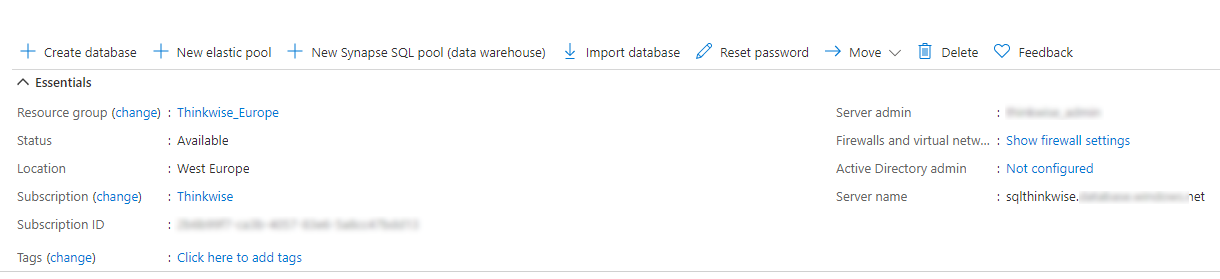
On the tab Deploy > Server Connections, enter the server connection options. You can find the hostname in the SQL server environment under Overview. Use the credentials provided when the SQL server environment was created.
screenshot: Connection options in the SQL server environment
-
On the tab Deploy > Dependency check, click the Check button.
-
On the tab Deploy > Database name, enter the name of the IAM database that you want to create and click Next.
-
On the tab IAM > Review and confirm, click Confirm.
The IAM database will now be created in the Azure environment.
Deploy the Software Factory database (optional)
It is possible to install the Thinkwise Software Factory development environment on Azure.
As the Software Factory also needs an IAM database, first deploy an additional IAM database by following the steps from
the previous chapter, and name this database IAM_SF.
Next, deploy the Software Factory database:
-
Select Install on the Software Factory product page.
-
On the tab IAM > Server connection, enter the server connection options and click Connect. You can find the hostname in the SQL server environment under Overview. Use the credentials provided when the SQL server environment was created.
-
On the tab IAM > Database Selection, select the previously installed IAM database (
IAM_SF) and click Next. -
On the tab SF > Server connection, use the same host and RDS credentials as IAM for the Software Factory database and click Connect.
-
On the tab SF > Dependency check, click Check.
-
On the tab SF > Database name, enter the Software Factory database name and click Next.
-
On the tab Deploy > Review and confirm, click Confirm.
The Software Factory database will now be created in the RDS environment.
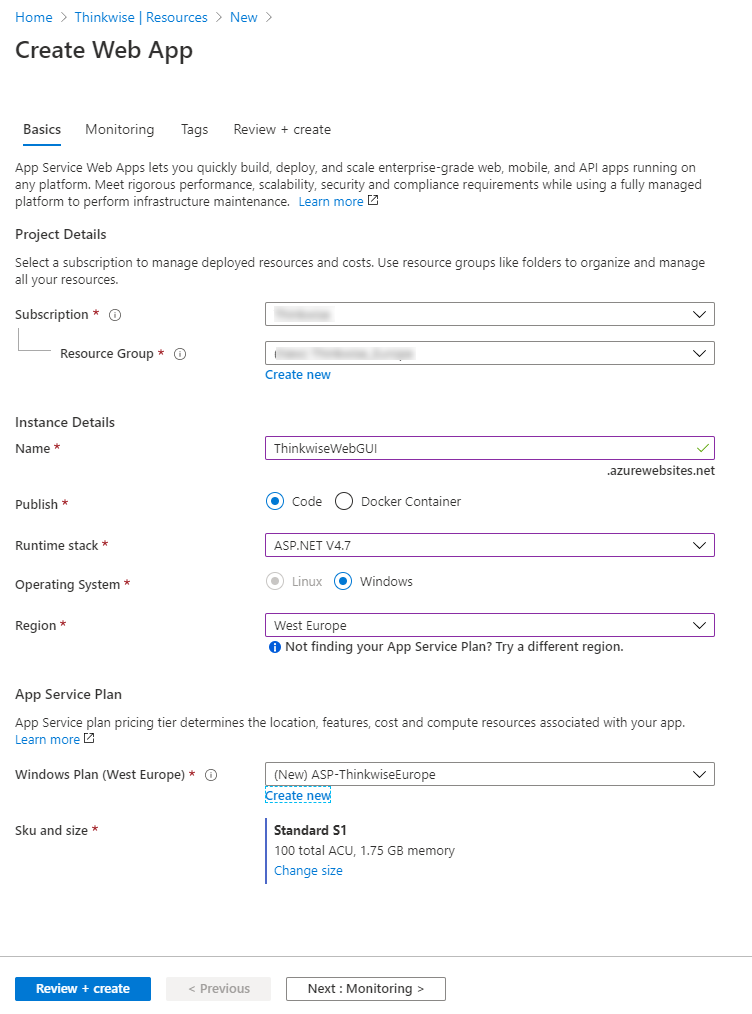
Create an Azure Web App
In the Azure Portal, select Create a resource to create a new Web App. The Azure portal provides a wizard to create the web app. This wizard requires the following fields:
| Field | Description |
|---|---|
| Subscription | A valid and active Azure subscription. |
| Resource group | A valid resource group. |
| App name | The name of the web app. This name becomes part of the app's URL, so it must be unique among all Azure App Service web apps. |
| Publish | You can deploy your application to App Service as code or as a ready-to-run Docker image. For all the Thinkwise applications, choose code. |
| Runtime stack | Choose Runtime stack ASP.NET V4.7. |
| Operating system | App Service can host applications on Windows or Linux servers. Choose Windows. |
| Region | The Azure region from which your application will be served. |
| App Service Plan | See below for information about App Service plans. |
App Service Plans
An App Service plan is a set of virtual server resources that run App Service apps. A plan's size (sometimes referred to as its sku or pricing tier) determines the performance characteristics of the virtual servers that run the apps assigned to the plan and the App Service features that those apps have access to. Every App Service web app you create must be assigned to a single App Service plan that runs it.
A single App Service plan can host multiple App Service web apps. In most cases, the number of apps you can run on a single plan will be limited by the performance characteristics of the apps and the resource limitations of the plan.
App Service plans are the unit of billing for App Service. The size of each App Service plan in your subscription, in addition to the bandwidth resources used by the apps deployed to those plans, determines the price that you pay. The number of web apps deployed to your App Service plans has no effect on your bill.
You can use any of the available Azure management tools to create an App Service plan. When you create a web app via the Azure portal, the wizard will help you to create a new plan at the same time if you don't already have one.
screenshot: Create a Web app
Select Review and Create to navigate to the review page, then select Create to create the app.
It can take a few seconds to get your web app created and ready for use.
The portal will display the deployment page, where you can view the status of your deployment. Once the app is ready, navigate to the new app in the Azure portal:
-
On the Azure portal menu or from the Home page, select All resources.
-
Select the App Service for your web app from the list. Make sure to select the App Service, and not the App Service Plan.
screenshot: Select the App Service

-
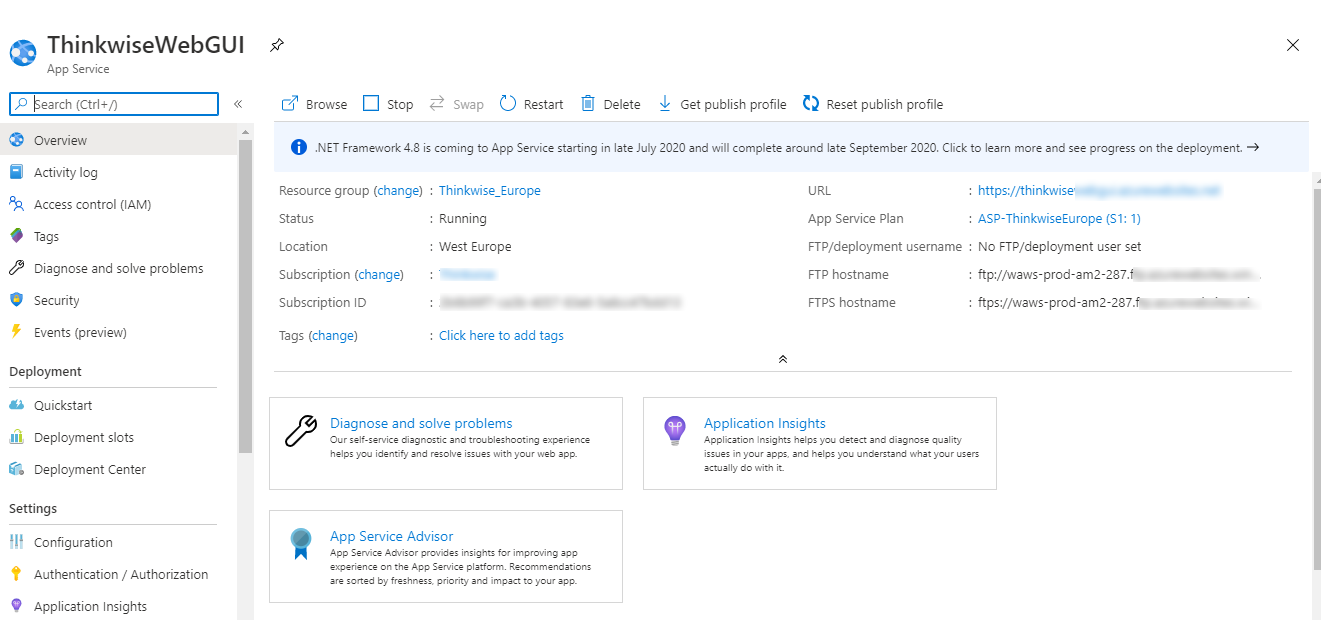
The portal displays the web app overview page.
screenshot: Web app overview
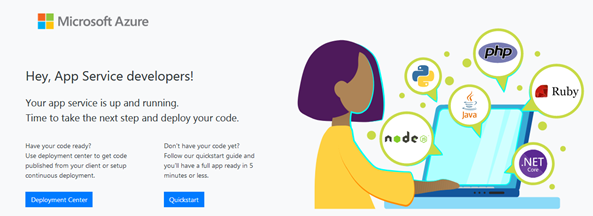
-
To preview your new web app's default content, select its URL at the top right. The placeholder page that loads indicates that your web app is up and running and ready to receive deployment of your Thinkwise application.
screenshot: Web app up and running
Deploy a Thinkwise Application to an App service
There are different ways of deploying a Thinkwise Application to an App Service. In this document we'll explain using Kudu. Other possible ways to deploy a Thinkwise Application are:
- Azure DevOps
- Octopus
- Visual Studio
- Etc.
Start Kudu
Kudu is the engine behind deployments in Azure Web Sites. It can also run outside of Azure. For more information about Kudu, look at https://github.com/projectKudu/Kudu/wiki.
To start Kudu:
-
Go to the App Service resource and select Advanced Tools.
screenshot: Advanced tools
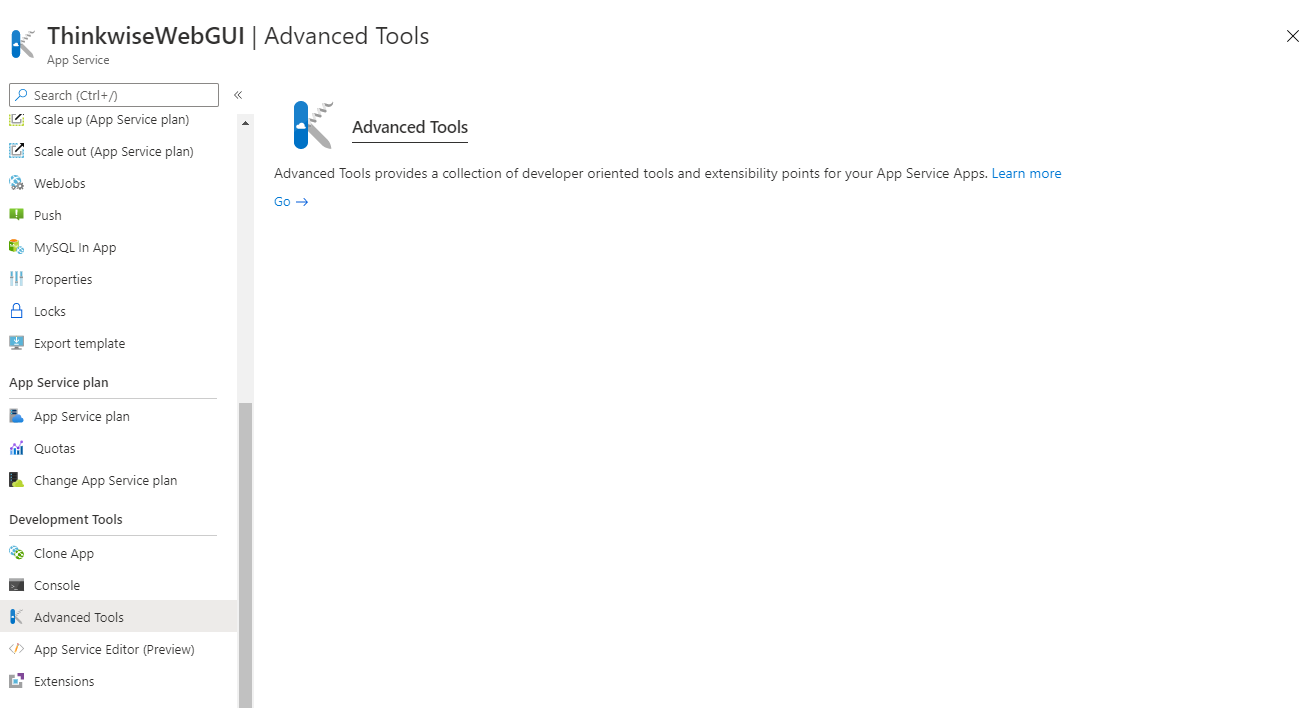
-
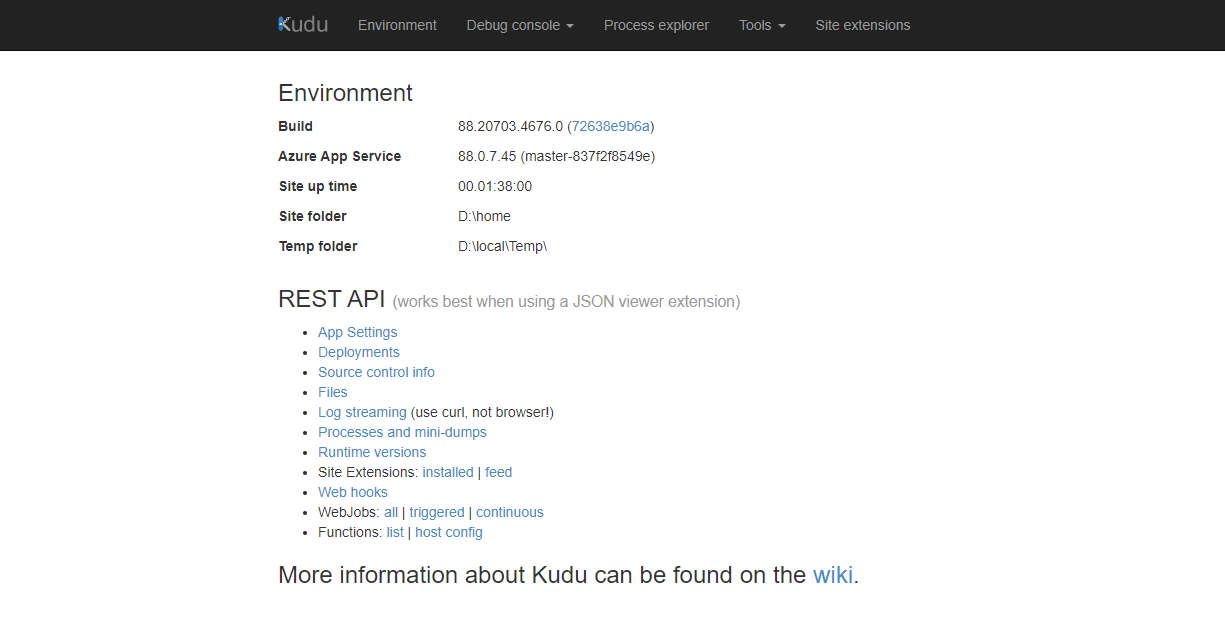
Select Go. The following screen opens in a new browser tab:
screenshot: Kudu environment
-
Select CMD from the Debug console menu.
screenshot: Debug console menu

-
The Kudu CMD screen is divided in two sections. The first section is an Explorer view, the second section is a command box. Both are started at the root of the App Service.
screenshot: Kudu CMD screen

Install the Thinkwise Web GUI
-
Download the Thinkwise Web GUI from the TCP portal.
-
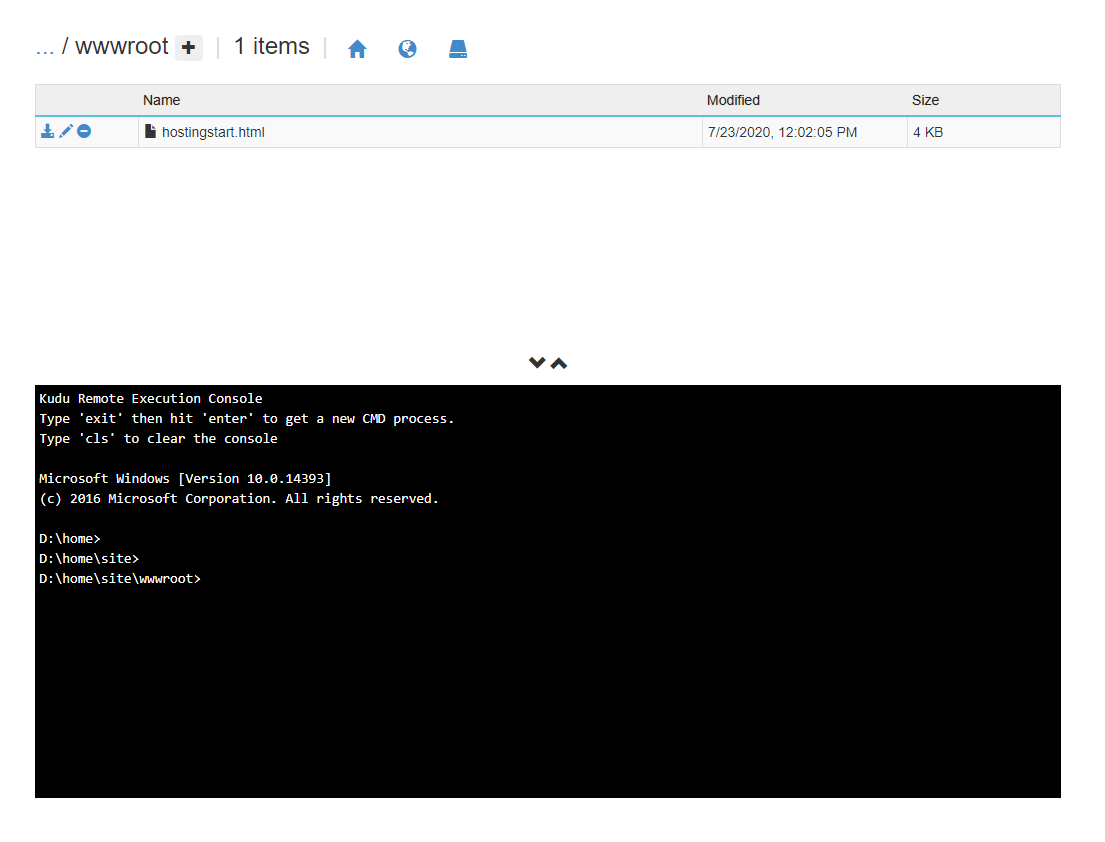
In the Kudu CMD screen, navigate to
D:\home\site\wwwroot.screenshot: Kudu CMD screen

-
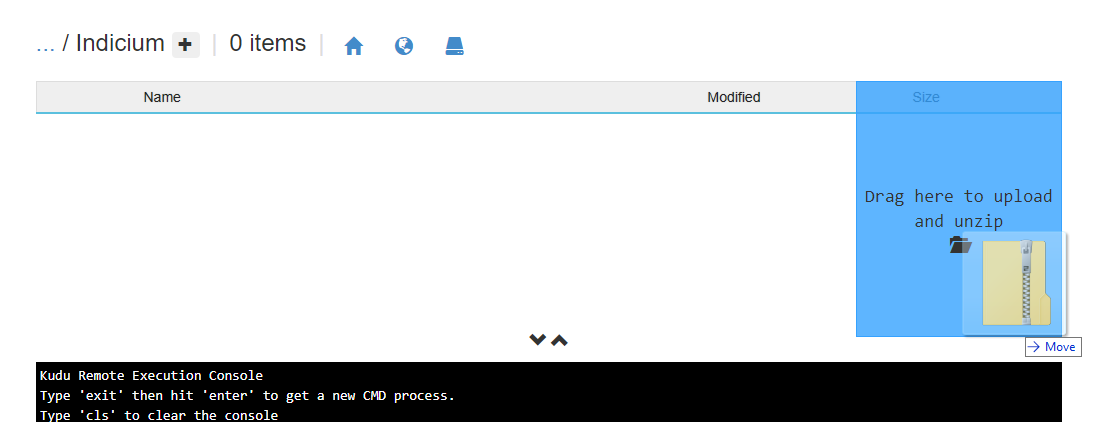
Drag the downloaded Web GUI zip file from the Windows Explorer to the Kudu Explorer view.
screenshot: Kudu explorer view
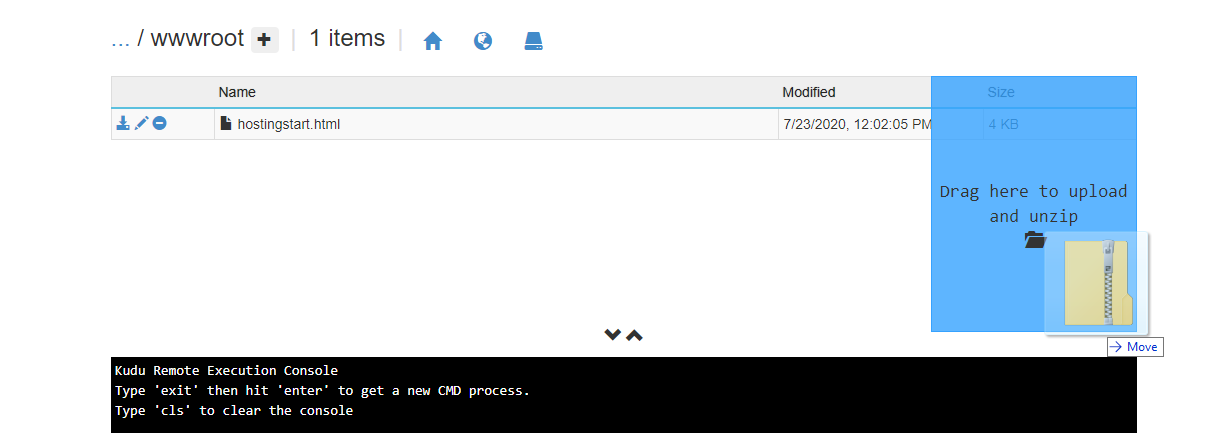
Kudu will automatically unzip the file. The Thinkwise Web GUI is now deployed.
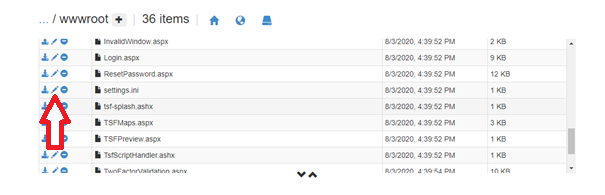
-
Select the blue pencil to edit the 'settings.ini' file.
screenshot: Edit settings.ini
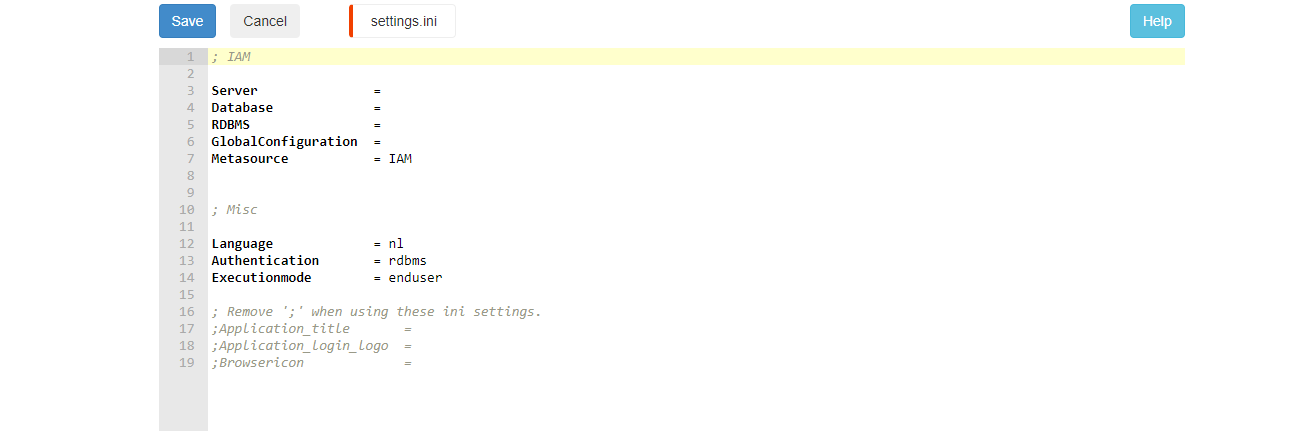
-
Fill in the required parameters and click Save. More information about the Web GUI configuration file can be found here.
screenshot: Required parameters
The Thinkwise Web GUI is now running.
Install the Thinkwise Universal GUI with Indicium
For security reasons (to avoid having to enable Cross-Origin Resource Sharing), the Universal GUI and Indicium service tier will be installed in the same Web App.
-
Download both the Thinkwise Universal GUI and the Indicium (Universal) service tier from the TCP portal.
-
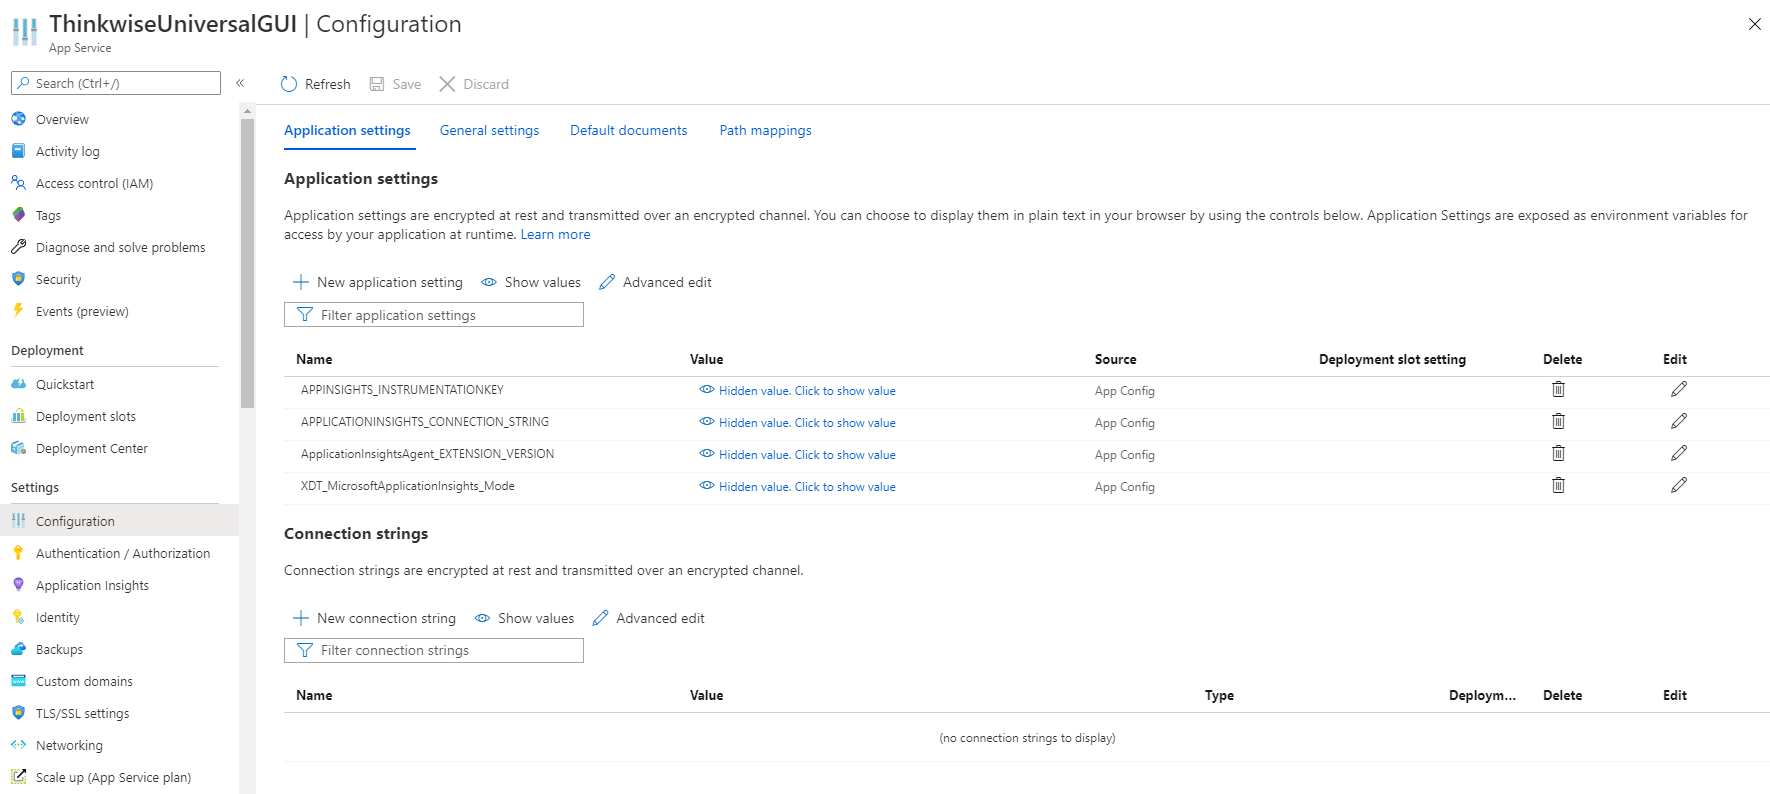
Go to the App Service resource and select Configuration.
screenshot: App service resource configuration
-
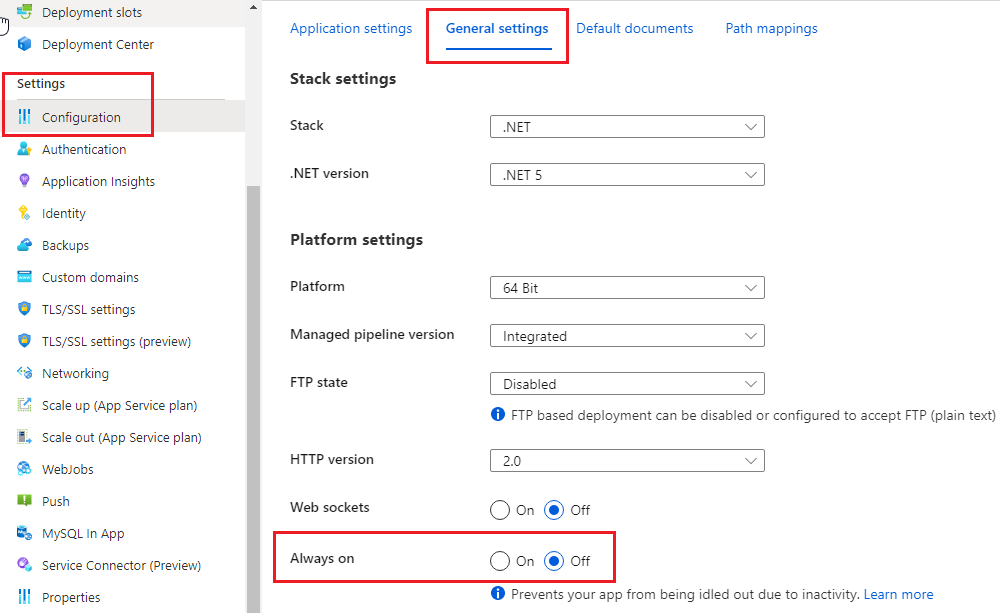
Select the General settings tab page.
The Always on setting keeps the Indicium service tier running, making it more responsive to requests after idle periods. You should enable Always On if you have continuous system flows running.
screenshot: General settings tab
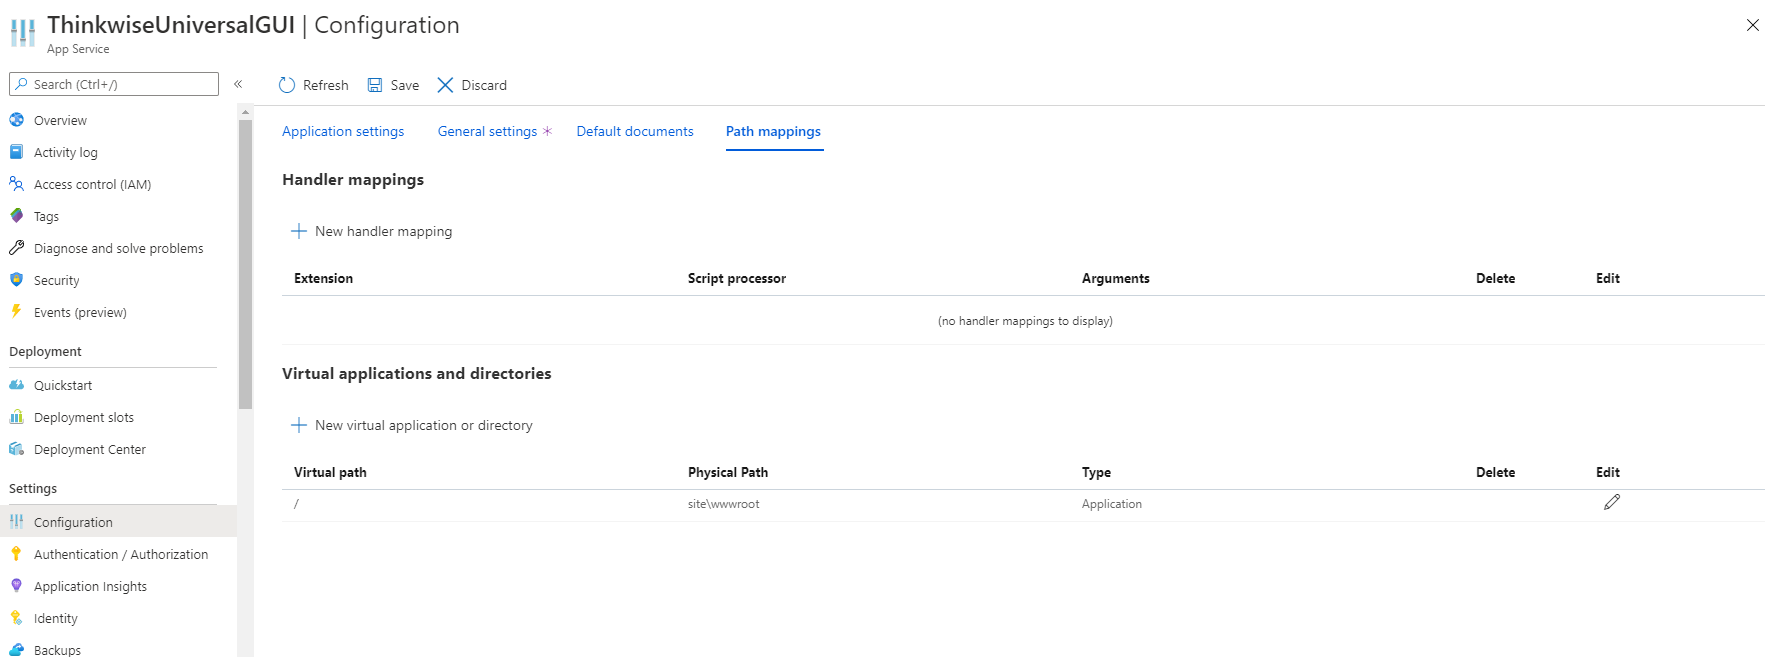
-
Select the Path Mappings tab page.
screenshot: Path mappings tab
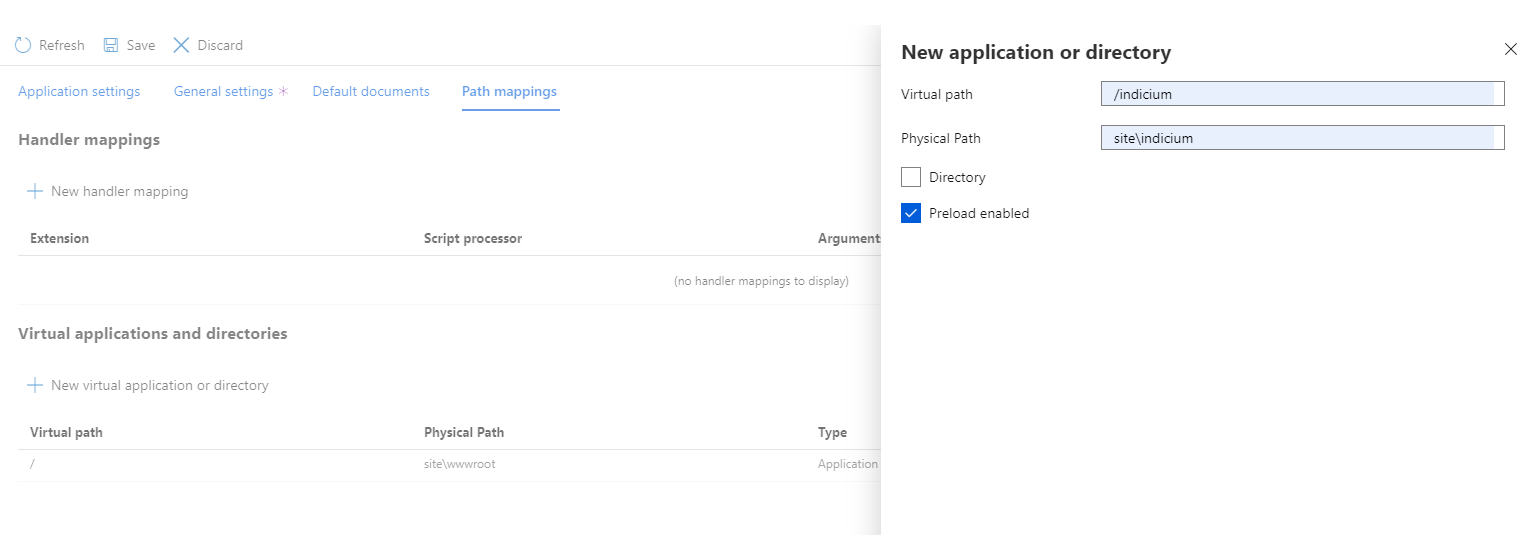
-
Select New virtual application or directory. At Virtual Path fill in
/indicium, at Physical Path fill insite\indicium. Uncheck Directory and check Preload enabled. Select OK and then select Save.screenshot: New application or directory
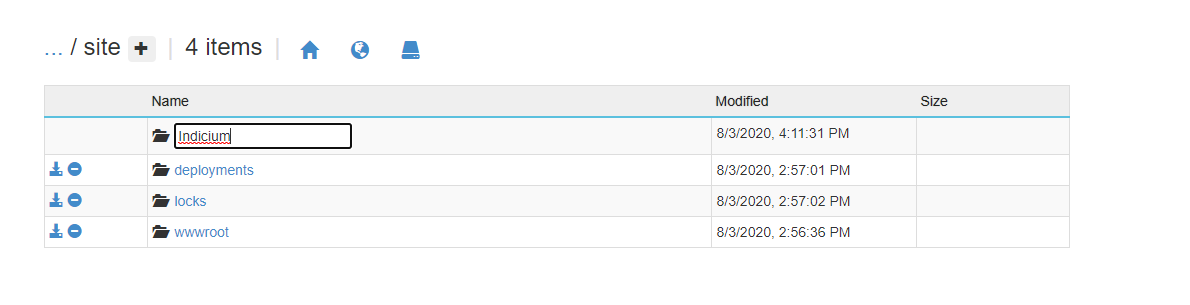
The result will look like this:
screenshot: Result

-
To deploy the downloaded zip files, open Kudu, navigate to the
D:\home\sitedirectory and select the plus sign to create a new folder. -
The name of the new folder is the Physical path used at step 4,
indicium.screenshot: Create a new folder
-
Open the
indiciumfolder. -
Drag the downloaded Indicium (Universal) zip file from the Windows Explorer to the Kudu Explorer view.
screenshot: Zip file to Kudu explorer
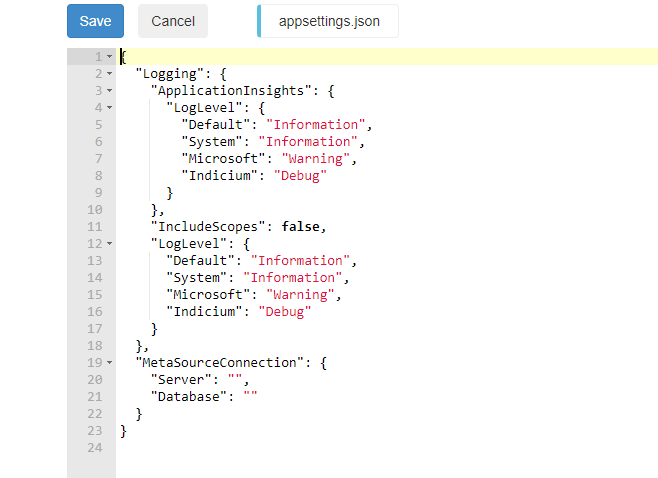
-
Select the blue pencil to edit the
appsettings.jsonfile. -
Fill in the required parameters and select the Save button. More information about the Indicium configuration file can be found here.
screenshot: Parameters
-
Next, go to
D:\home\site\wwwroot.screenshot: Go to ...
-
Drag the downloaded Universal GUI zip file from the Windows Explorer to the Kudu Explorer view.
-
Select the blue pencil to edit the
config.jsonfile. More information about the Universal GUI configuration file can be found here. -
Set the ServiceUrl to the URL of Indicium, for example
https://thinkwiseuniversalgui.azurewebsites.net/indicium/iam/iamand select the Save button.
The Thinkwise Universal GUI and Indicium are now running.
Reports in Azure
To use DevExpress reports in an Azure environment, you have to set the extended property HostedInAzure to true.
For more information, see Extended properties.
Troubleshooting in Azure
Slow request responses on Azure
Universal GUIIf your Thinkwise applications on Azure respond slowly, it is probably because WebSockets are not enabled. The Universal GUI relies on WebSockets for efficient two-way communication. For instructions on enabling WebSockets in Azure, see Enable WebSockets in Azure.
Enable WebSockets in Azure
To enable WebSockets in Azure:
- In the Azure portal, select the app service for which you want to enable WebSockets.
- Select Settings > Configuration from the menu on the left-hand side.
- Select the tab General settings.
- Under Platform settings, locate Web sockets and set it to On.
For more information about WebSockets in Azure, see this Microsoft blog.
Slow file import on Azure
Azure offers two methods for importing your files:
-
Traditional method: This default method is suitable for smaller files. However, importing large files can be slow and may result in a "500 Internal Server Error" and an incomplete import due to timeout.
-
Asynchronous method: This method prevents timeouts by handling the import in the background. It ensures large file imports are completed, but the process might take longer than the traditional method.
To use the asynchronous method for large file imports, you need to enable WebSockets in your Azure configuration. For instructions on enabling WebSockets in Azure, see Enable WebSockets in Azure.
Request body length exceeded the limit
An issue with uploading files to an application in an Azure Application Gateway may be caused by the inspection of the request body. If, for example, the maximum request body size is set to 128 KB, only files smaller than 128 KB can be uploaded.
Prerequisites:
- Application Gateway v2 Web Application Firewalls (WAF) and
- Core Rule Set 3.2 or later
- In the Azure portal, go to the Policy settings for the WAF.
- Clear the checkbox Enforce maximum request body limit.
For more information, see the Microsoft documentation.