Amazon S3 bucket as file cache
Use an Amazon S3 bucket as file cache
To use an Amazon Simple Storage Service (Amazon S3) bucket as a file cache for Indicium to store files, you must take the following steps:
| Step |
|---|
| Create an Amazon S3 bucket |
| Block public access |
| Disable bucket versioning |
| Clear the file cache periodically |
| Use an S3 bucket as a file cache |
| Create a user with programmatic access |
Create an Amazon S3 bucket
To create an Amazon S3 bucket:
- Open the AWS console.
- Search for 'S3', and select the resulting S3 page.
- On this page, click Create bucket.
- In the setup page, enter a Name and a Region where the data will be stored.
Block public access
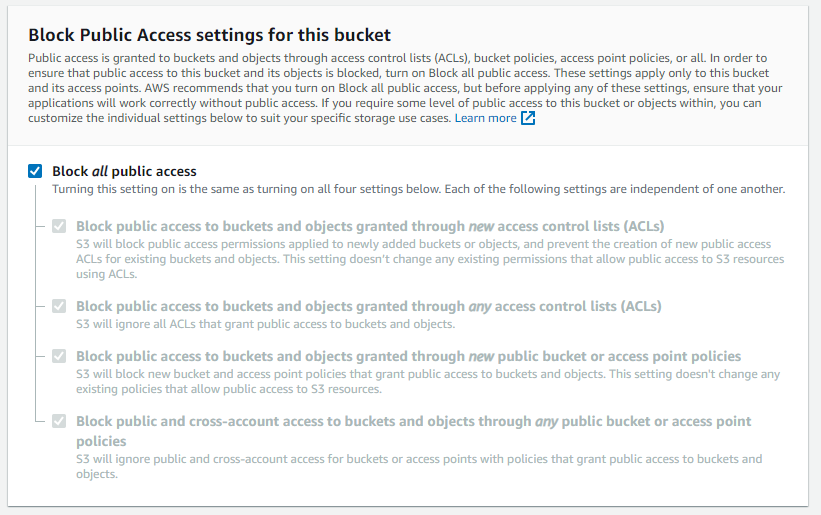
It is strongly recommended to select the Block all public access setting for safety purposes. When creating a bucket, public access is blocked by default, so you can leave this setting as it is:
 Block all public access setting
Disable bucket versioning
To ensure the deletion of files will work as expected, you must disable Bucket Versioning in the creation screen of the S3 bucket. Bucket versioning is disabled by default, so you can leave this setting as it is:
 Bucket versioning settings from the creation tab
Clear the file cache periodically
To clear the file cache periodically, follow these steps.
We recommend clearing files every seven days to keep the cache clean and the costs low.
Use an S3 bucket as a file cache
To use an S3 bucket as a file cache for Indicium, you first need to create a user with programmatic access. If such a user exists, you can skip this part and continue with Create an ElastiCache Redis cache.
Create a user with programmatic access
To create a user with programmatic access:
-
In the AWS Management Console, select IAM.
-
In the menu on the left-hand side, select Users.
-
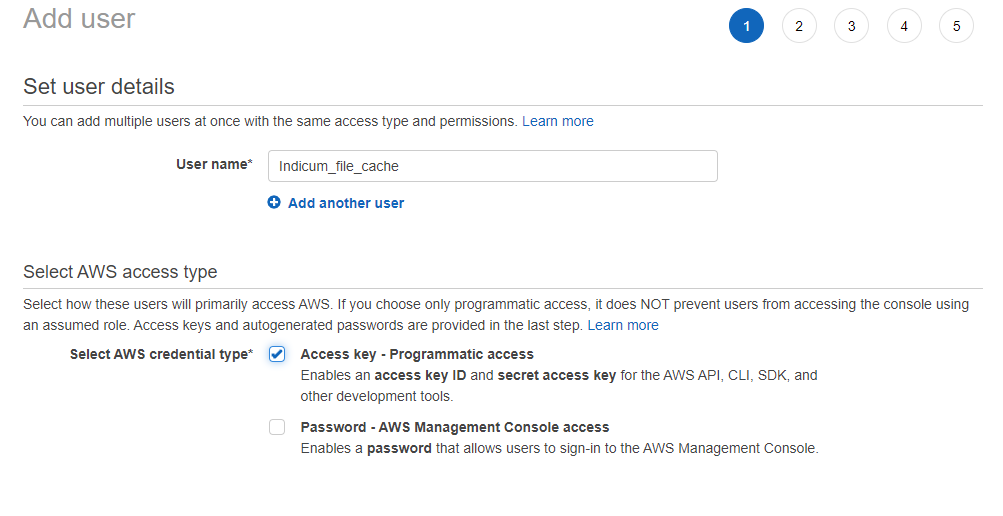
Click Add users on the right-hand side. The Add user screen opens.
-
In this screen, select AWS credential type: Access key - Programmatic access.
-
If password access is necessary, select Password - AWS Management Console Access.
-
Click Next.
 Add user
 -
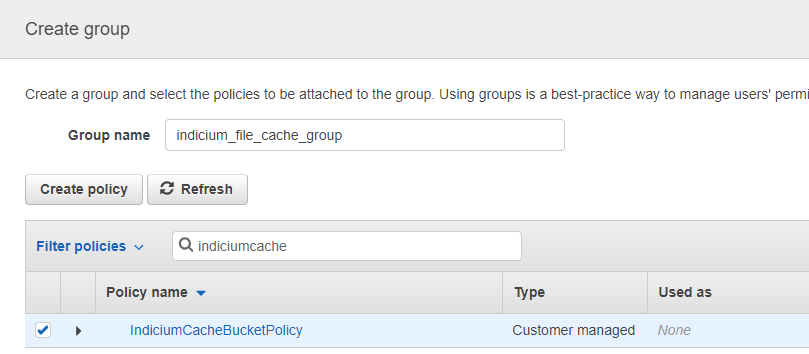
On the next page, select Create group. A popup dialog opens.
-
Enter a Group name.
-
Click Create policy (a new browser tab will open).
-
Copy the following policy to the JSON tab.
{
    "Version": "2012-10-17",
    "Statement": [
        {
            "Sid": "VisualEditor0",
            "Effect": "Allow",
            "Action": [
                "s3:PutObject",
                "s3:GetObject",
                "s3:GetObjectAttributes",
                "s3:ListBucket",
                "s3:DeleteObject"
            ],
            "Resource": [
                "arn:aws:s3:::<bucket_name>",
                "arn:aws:s3:::<bucket_name>/*"
            ]
        }
    ]
} -
Replace both occurrences of
<bucket_name>with the name of the S3 bucket. -
Click Next: Tags and Next: Review.
-
Provide a policy name.
-
Click Create policy.
-
Close the browser tab and return to the Create group browser tab.
-
Click Refresh.
-
Select the policy you just created.
-
Click Create group.
 Create group
 -
Select the newly created user group.
-
Click Next.
-
Optionally, you can add tags.
-
Click Next.
-
Click Create User.
-
This screen displays the Access key ID and Secret Access Key. Add the corresponding values to the
appsettings.jsonconfiguration file:
"FileCache": {
    "Type": "AWSS3",
    "AWSRegion": "<Bucket region>",
    "AWSAccessKeyID": "<Access key ID>",
    "AWSSecretAccessKey": "<Secret Access Key>",
    "AWSBucketName": "<Bucket name>"
  }
Now, the S3 bucket is added as a file cache to Indicium.